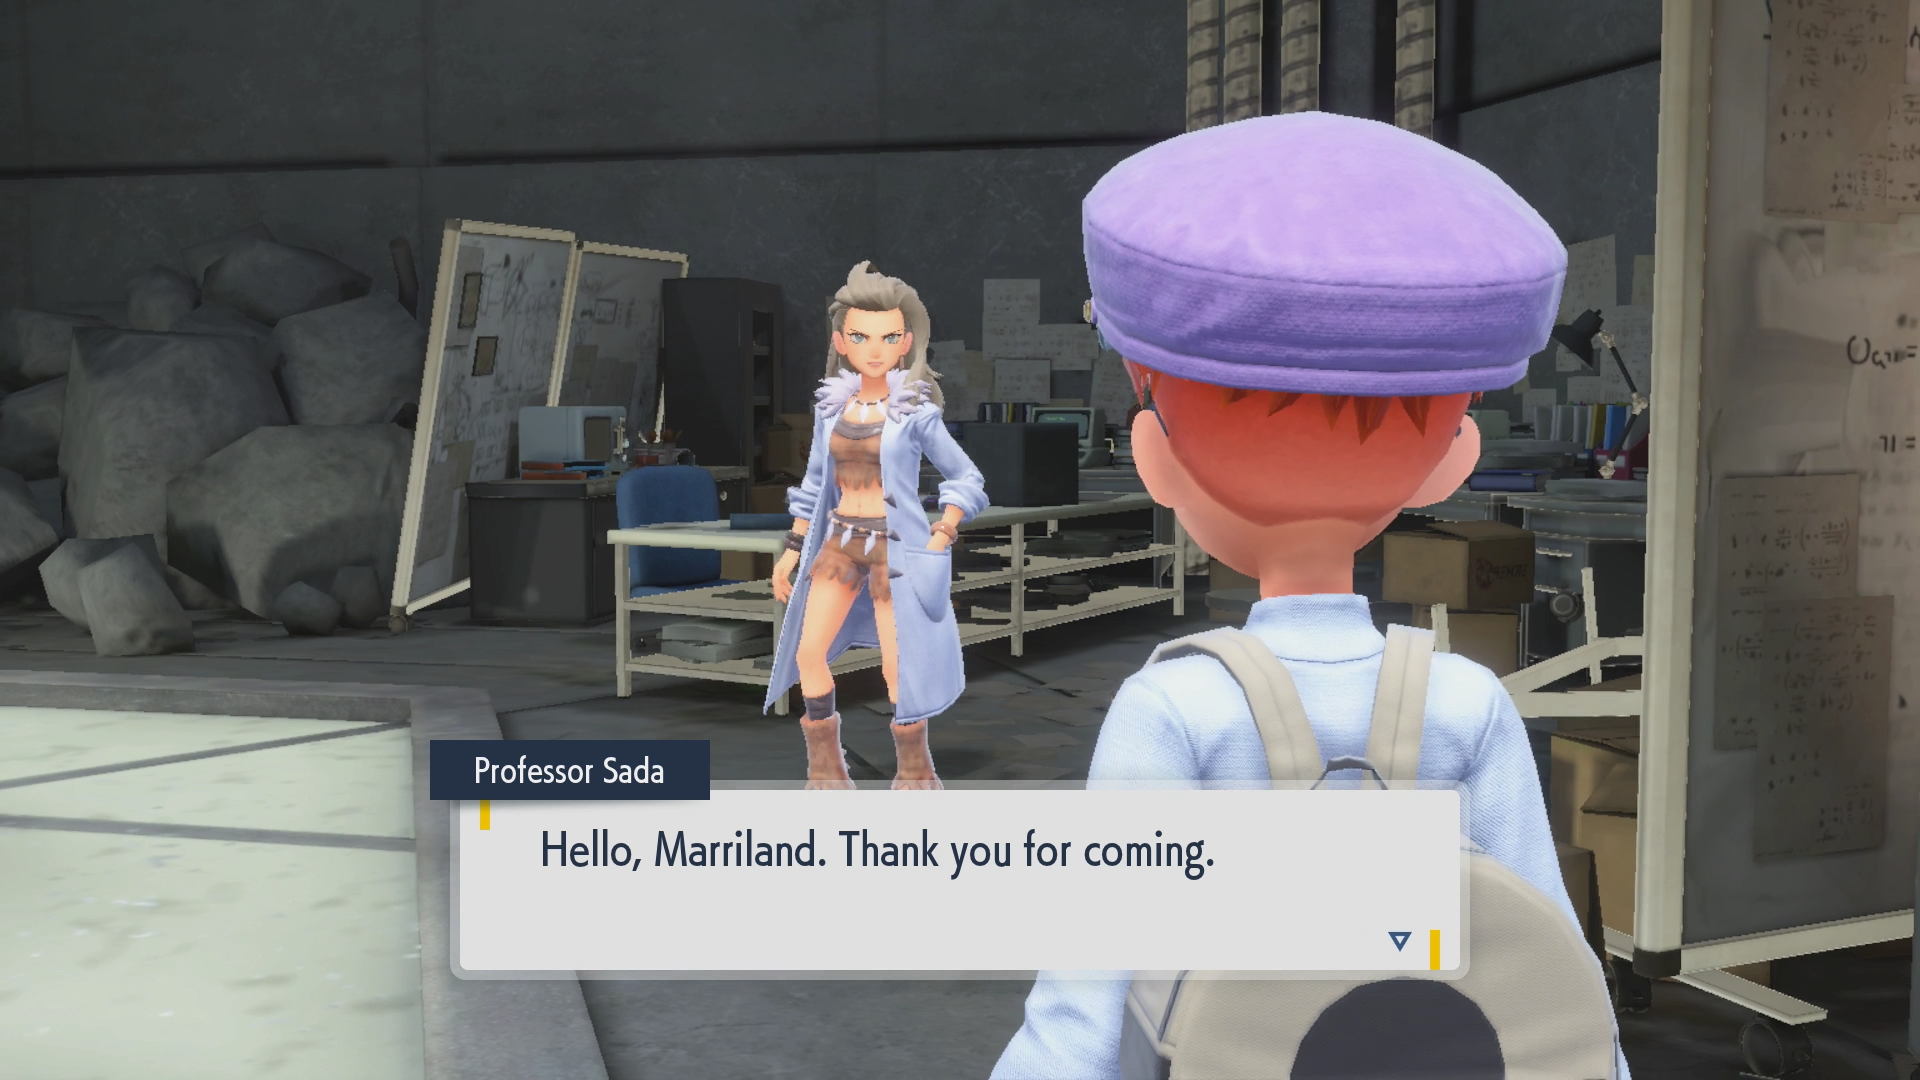
As you enter the Zero Lab in the depths of Area Zero, you’ll be greeted by Professor Sada in Pokémon Scarlet, although something won’t quite seem right with her. She’ll explain that she is not the true Professor Sada and is actually an AI that she created, built in the likeness of her body, and that the real Professor Sada passed away several years ago in an unfortunate accident.
She wishes to put a stop to the time machine in the Zero Lab, as it has grown too dangerous. Pick up the Booster Energy in the room, which boosts the power of Paradox Pokémon (raising their highest stat in battle) while held.
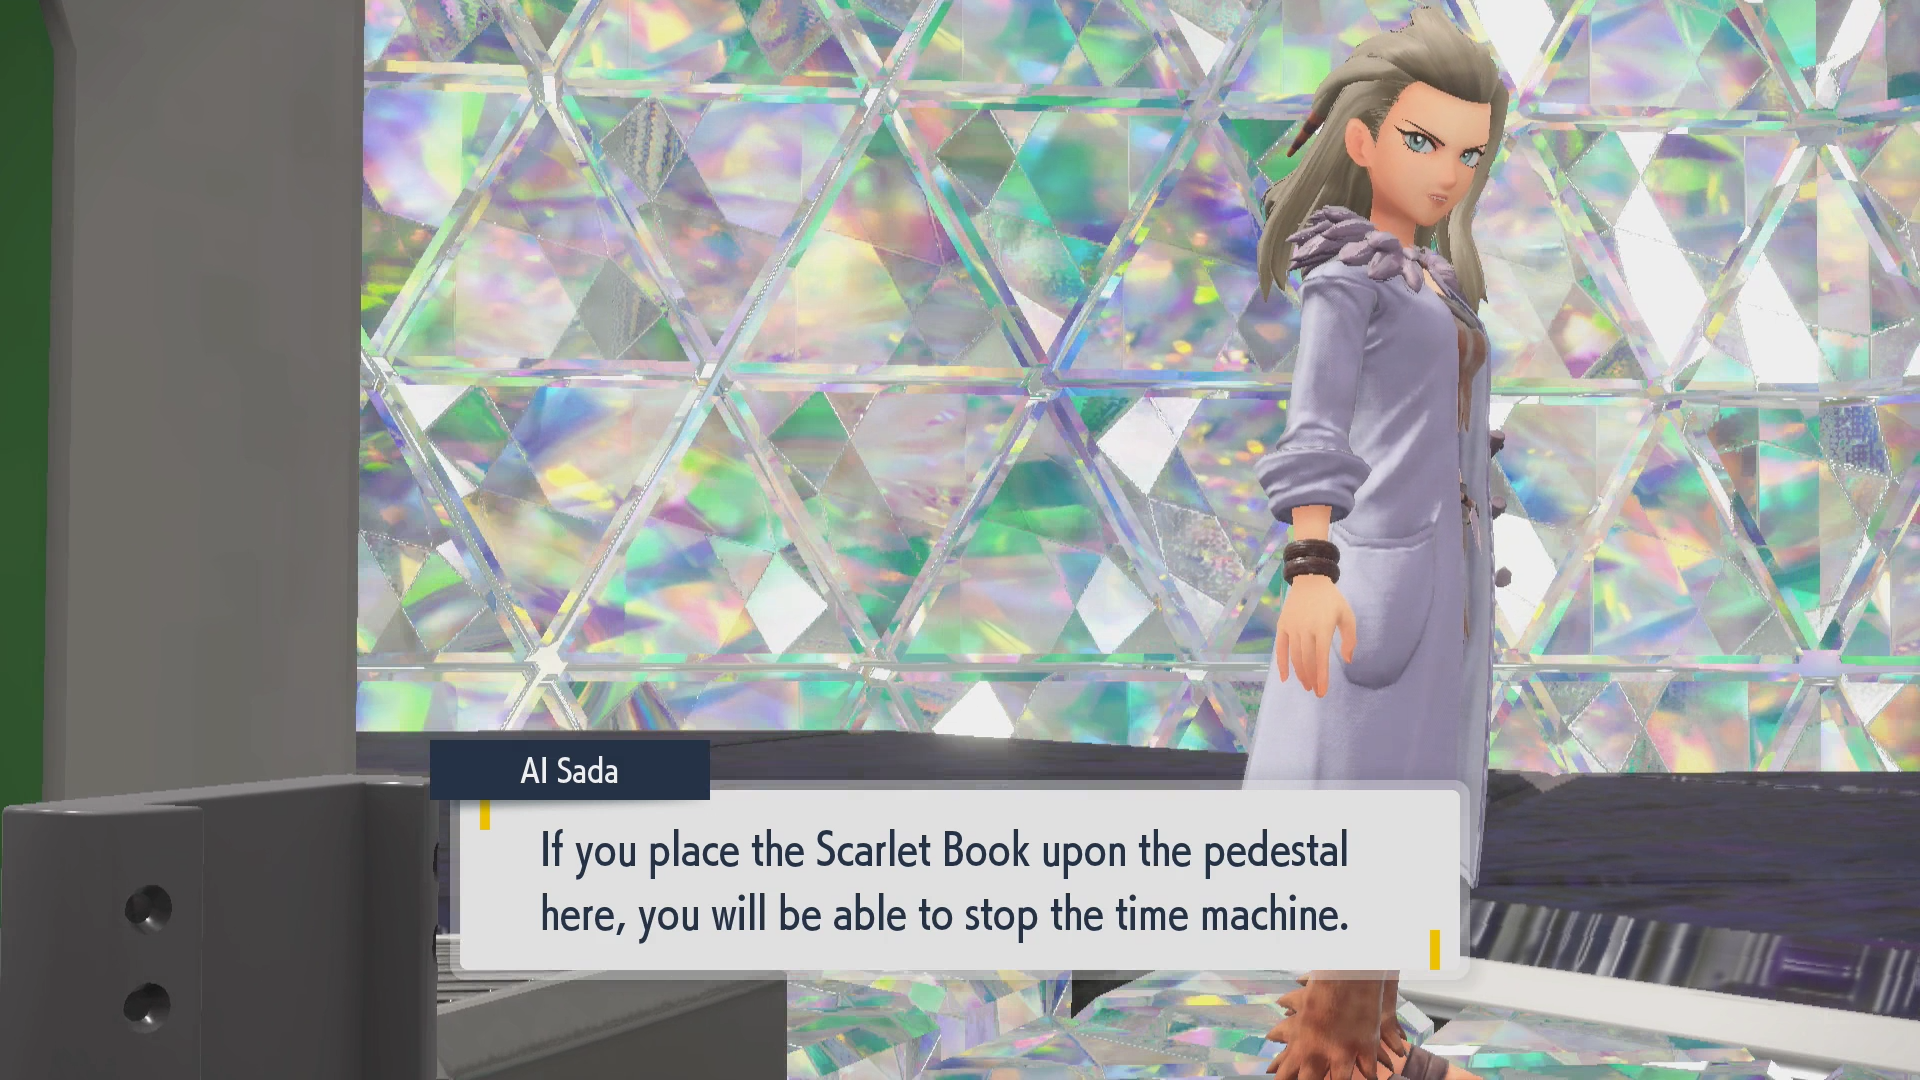

Continue further down into the depths of the Zero Lab and you’ll reach the core where the time machine is located. Sada will warn you that you will likely need to fight her after deactivating the time machine, which is true, and that you will need to place the Scarlet Book on the pedestal when you’re ready.
vs. AI Sada


 Leech Life
 Zen Headbutt
 Low Sweep
-
Lunge
 Ice Punch
-
Drain Punch
-
Zen Headbutt
 Play Rough
 Giga Drain
 Payback
-
Sucker Punch
 Earth Power
 Thunderbolt
 Shadow Ball
 Power Gem
 Mystical Fire
-
Power Gem
-
Earth Power
 Flash Cannon
-
Discharge
-
Earthquake
 Dragon Claw
-
Night Slash
-
Stone Edge
It’s time for a very tough fight against not just Professor Sada, but an artificial intelligence version of her, AI Sada (and, just for the record, that’s A.I., not “Al” as in Weird Al).
She uses a team that consists entirely of ancient Paradox Pokémon, many of which you may have no idea what type they are (if you’re not looking at the table above, of course), and all of them are very strong with a lot of type coverage. They all have the Ability Protosynthesis, which boosts their strongest stat so long as the weather is sunny, so if you have anything that sets up sunny weather, it’s best to avoid using it in this battle.
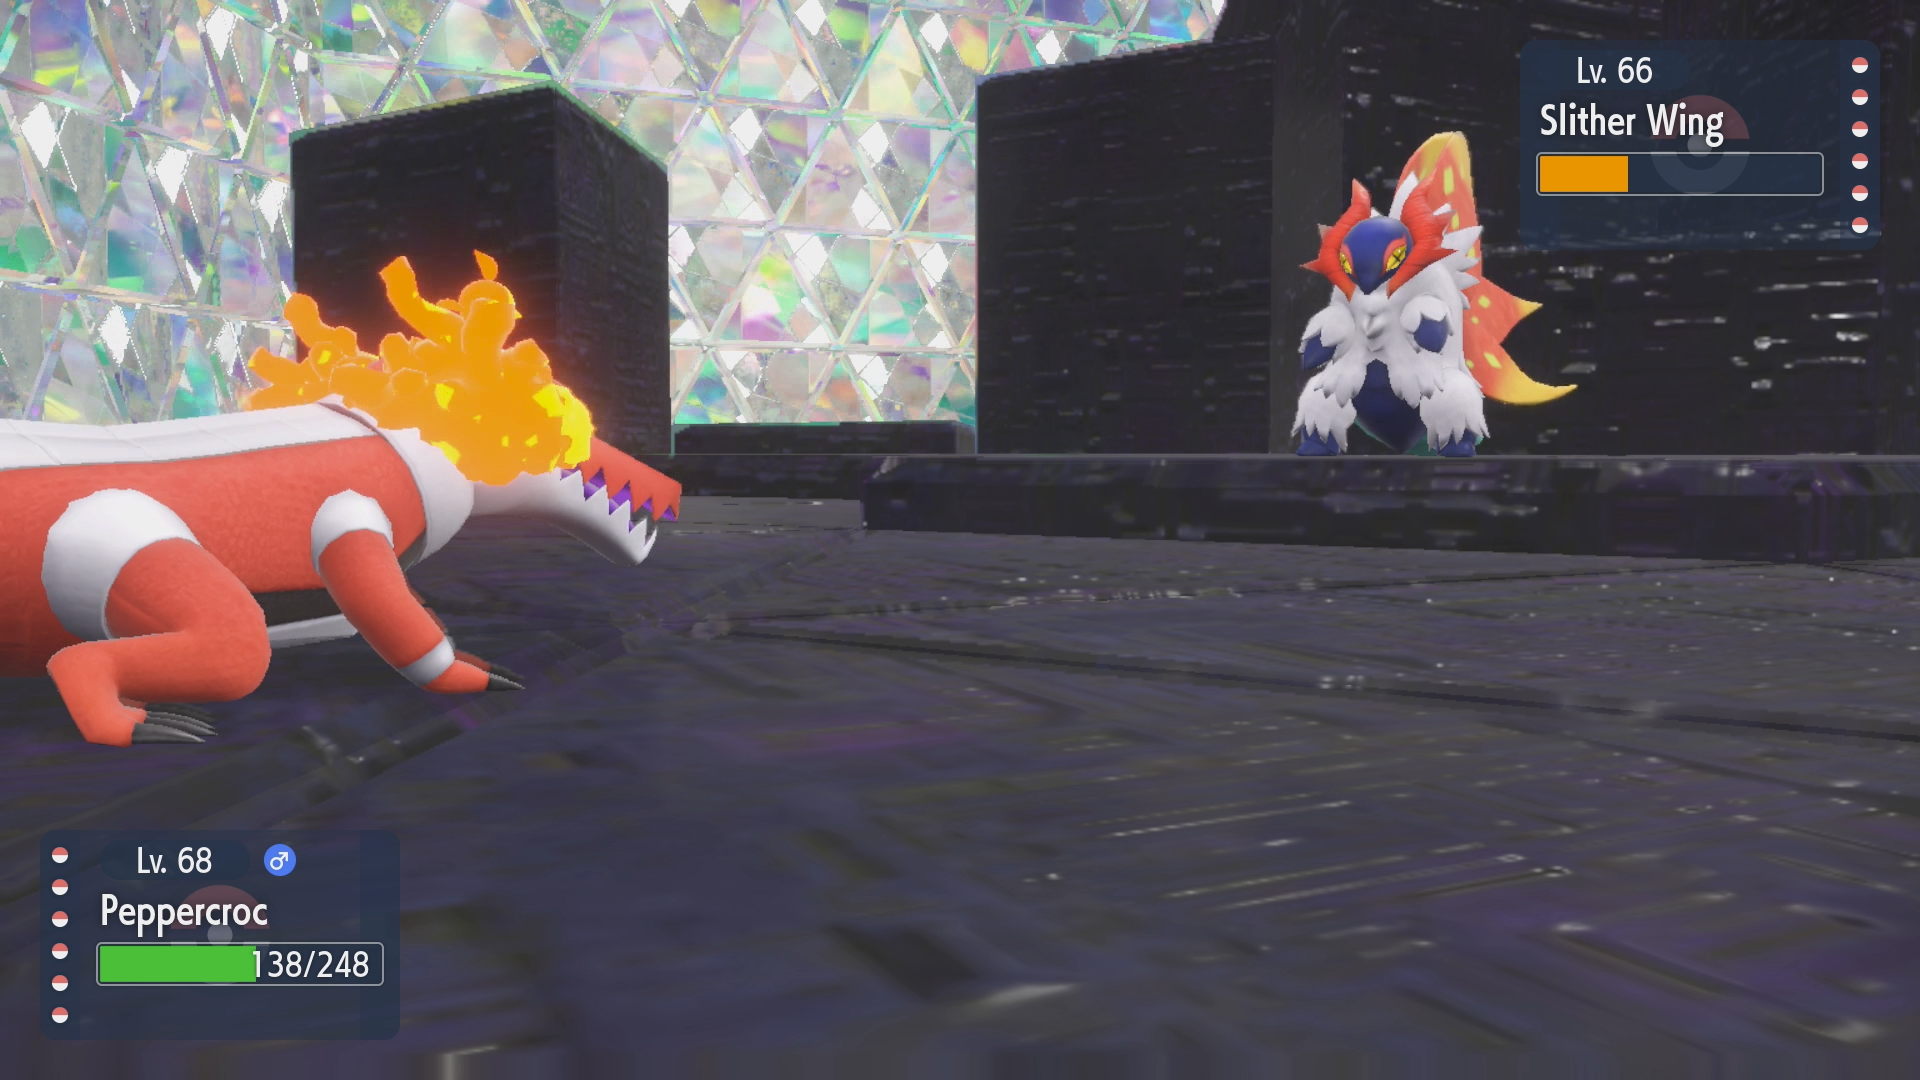
She leads with her Slither Wing, a Bug/Fighting-type Pokémon with a lot of Attack power. It hits hard with Lunge and Leech Life, and also has Low Sweep and Zen Headbutt for extra coverage. Leech Life will heal it up by 50% of the damage dealt.
The next four Pokémon she sends out will be sent out based on what she thinks will counter your current Pokémon, so keep in mind that you may deal with different threats in an order different from what’s below.
Her Scream Tail is a Fairy/Psychic-type and is very bulky, having a lot of HP, Defense, and Sp. Def, and it’s also quite fast. It doesn’t hit too hard with its low attacking stats but it does still do some damage with Play Rough, Drain Punch, Ice Punch, and Zen Headbutt.


Brute Bonnet is a Grass/Dark-type and is also quite bulky, almost as much as Scream Tail. However, it packs a lot more of a punch with pretty high Attack and the moves Payback and Sucker Punch. Sucker Punch in particular is something to watch out for, because it will strike first, before you have a chance to attack thanks to its higher priority. It also has Earth Power and Giga Drain, although its low Sp. Atk limit how much these do, thankfully.
Flutter Mane is a very powerful Ghost/Fairy-type that has very high Sp. Atk, Sp. Def, and Speed, although miserable HP and Defense, so you’ll want to focus on hitting it with Physical-based moves. It has Power Gem, Mystical Fire, Shadow Ball, and Thunderbolt for its moves—nothing Fairy-type, don’t worry. Shadow Ball will hit the hardest, but Mystical Fire also lowers your Sp. Atk by one stage after it hits you, which will make trying to take it down with Special-based moves even harder.
Sandy Shocks resembles Magneton, but it isn’t part-Steel-type: it’s actually a Ground/Electric-type Pokémon. It’s got high Sp. Atk and is also reasonably fast, too. It has Discharge and Earth Power for strong, hard-hitting STAB moves, and also has Flash Cannon and Power Gem for extra coverage.
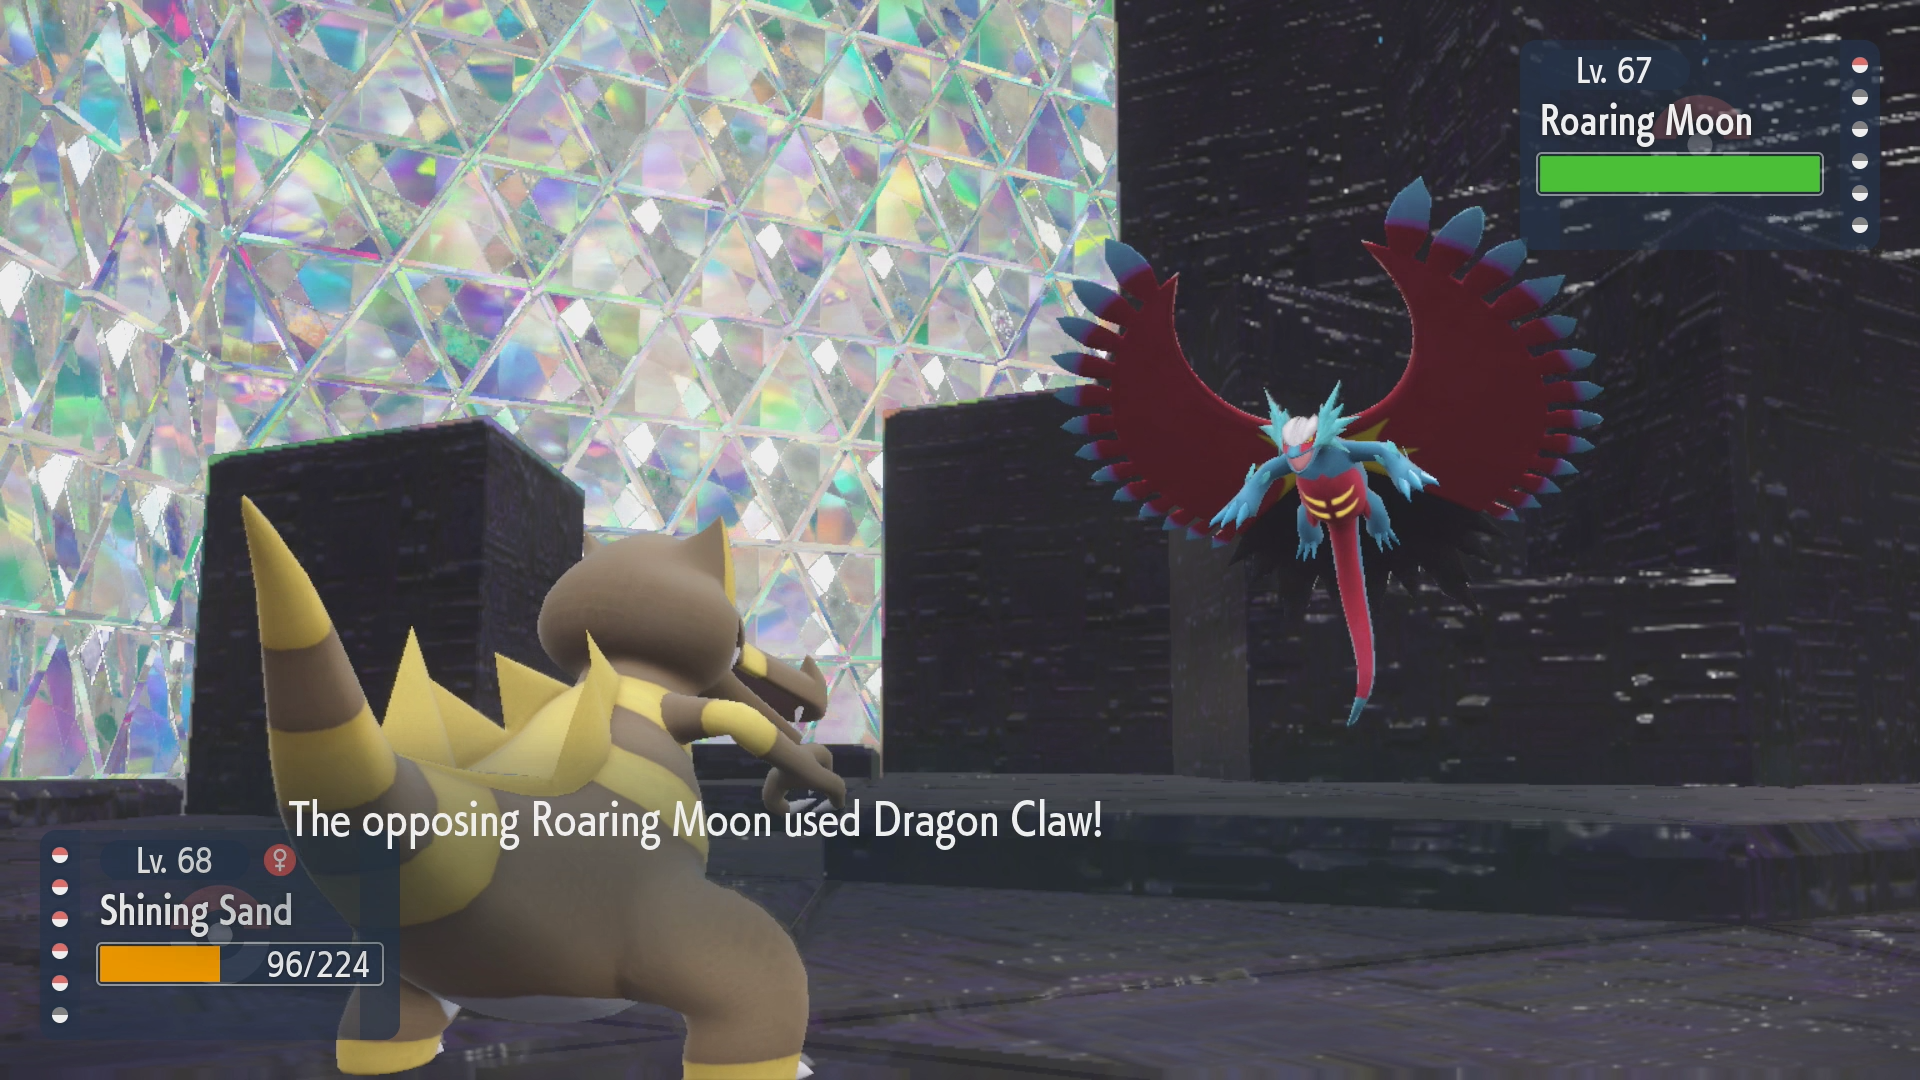
Last up is the star of her show, Roaring Moon, a very strong Dragon/Dark-type Pokémon resembling Salamence. It has the Booster Energy equipped, which will raise its Attack stat by activating Photosynthesis. It already has very high Attack, and it’s also very fast and resilient, so it can be a pain to take down. It has Dragon Claw, Night Slash, Stone Edge, and Earthquake for moves, and all of these moves will hit very hard. If you’re really struggling against it, using an X Defense in battle or using the move Reflect should help.
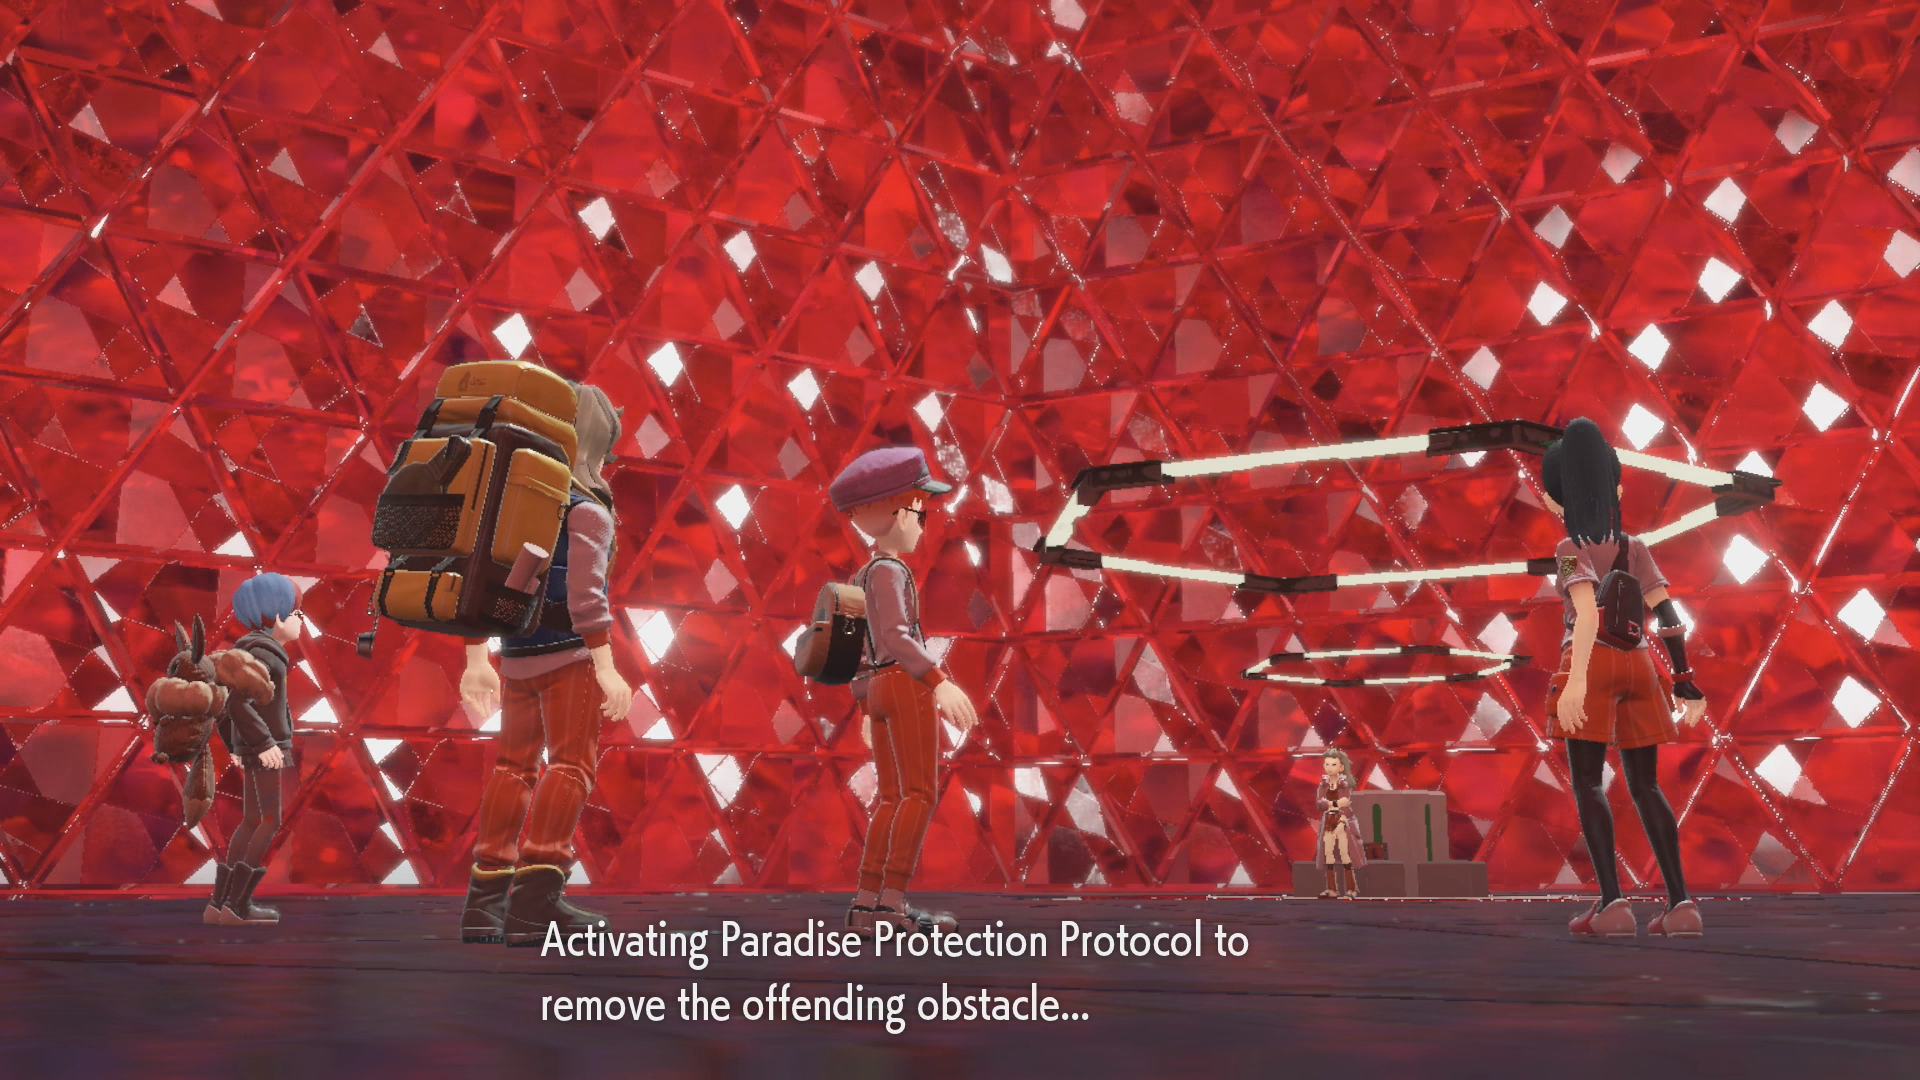
After you’ve defeated AI Sada, the time machine will appear to have powered down, and your friends will come rushing in. Some dialogue and important character interactions will occur, and just when things are looking fine, the background of the room will glow a vibrant red. Uh-oh! AI Sada will lose control again and activate the Paradise Protection Protocol in order to exterminate you.
vs. Paradise Protection Protocol


-
Flamethrower
-
Taunt
-
Bulk Up
 Giga Impact
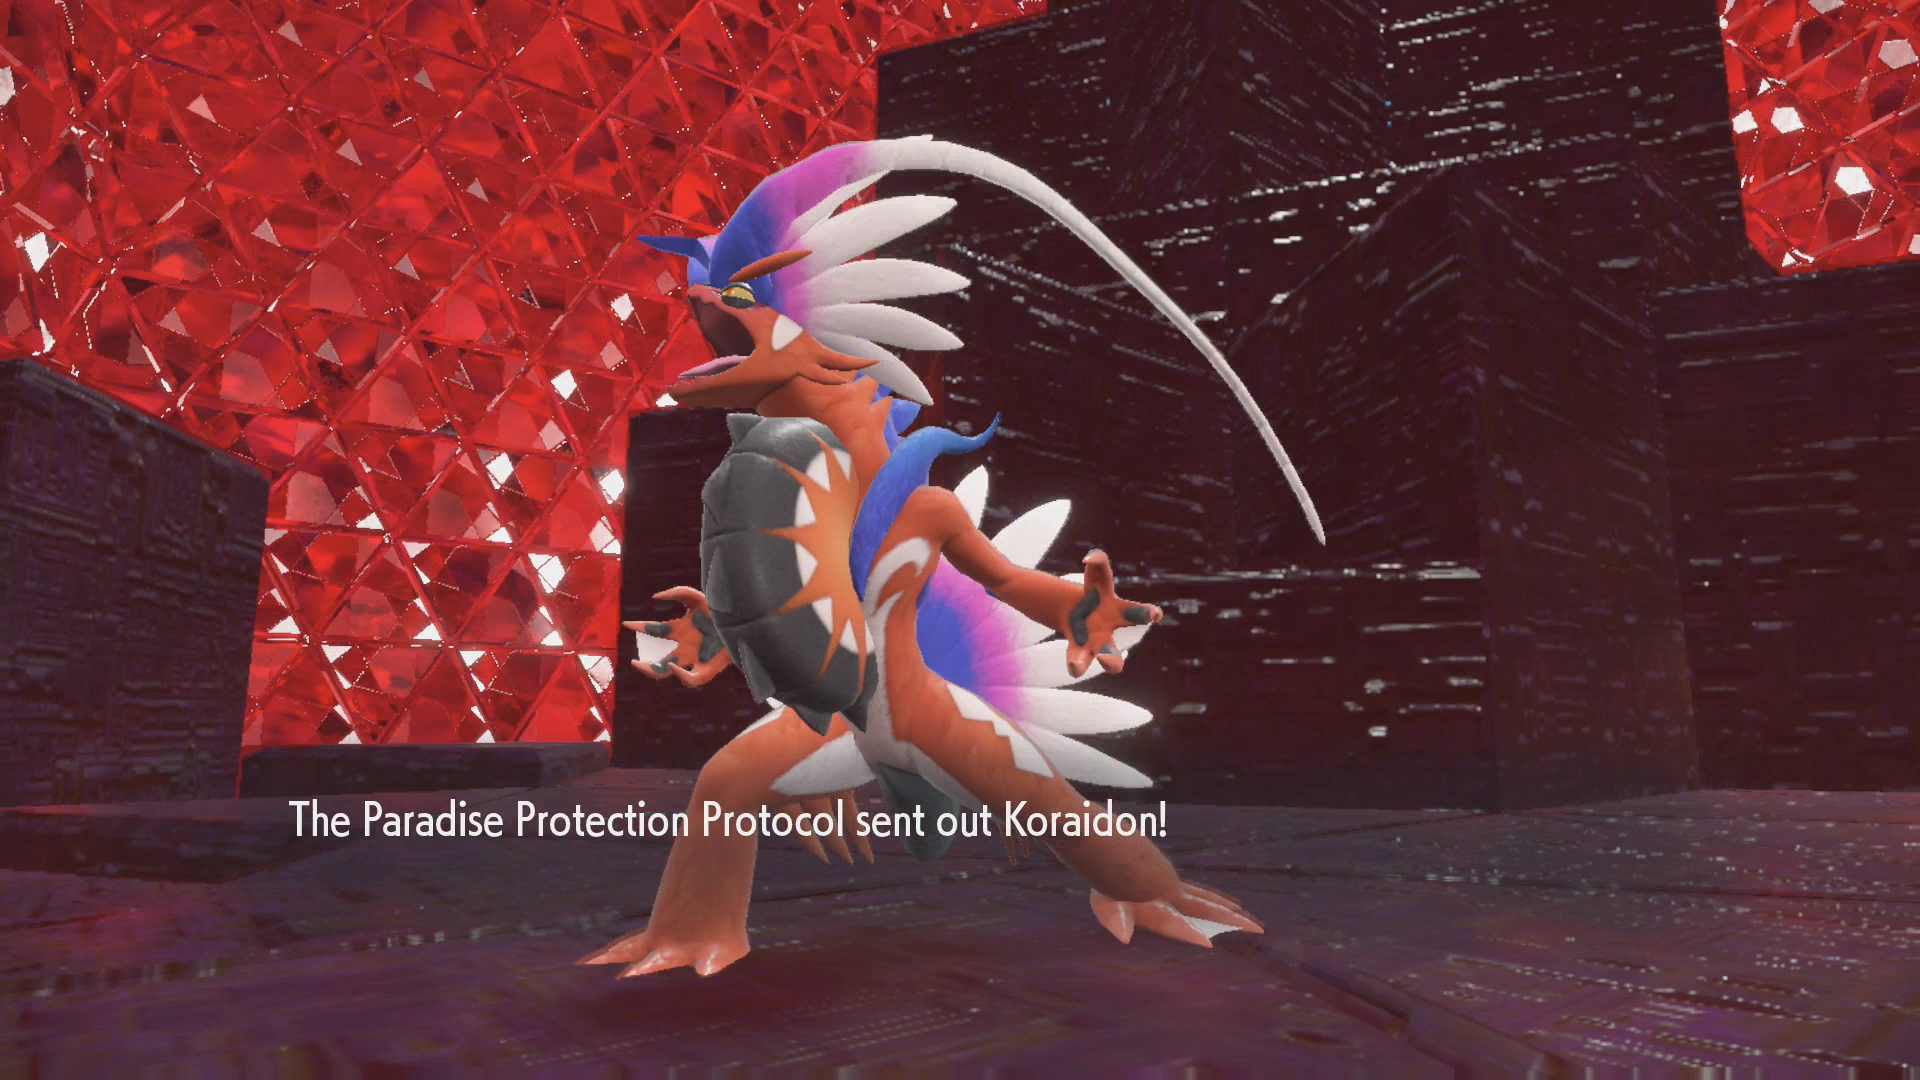
When the battle starts, the Paradise Protection Protocol will send out Koraidon—the same Koraidon from earlier that your own Koraidon was terrified of. When you go to send out your Pokémon, the ball will not open, remaining locked due to the Paradise Protection Protocol’s mechanism. It prohibits any Pokémon except for those matching the Professor’s ID from being sent out.
Your entire group can’t battle with any of their Pokémon, but there’s one Pokémon you have that was previously the Professor’s—your own Koraidon.
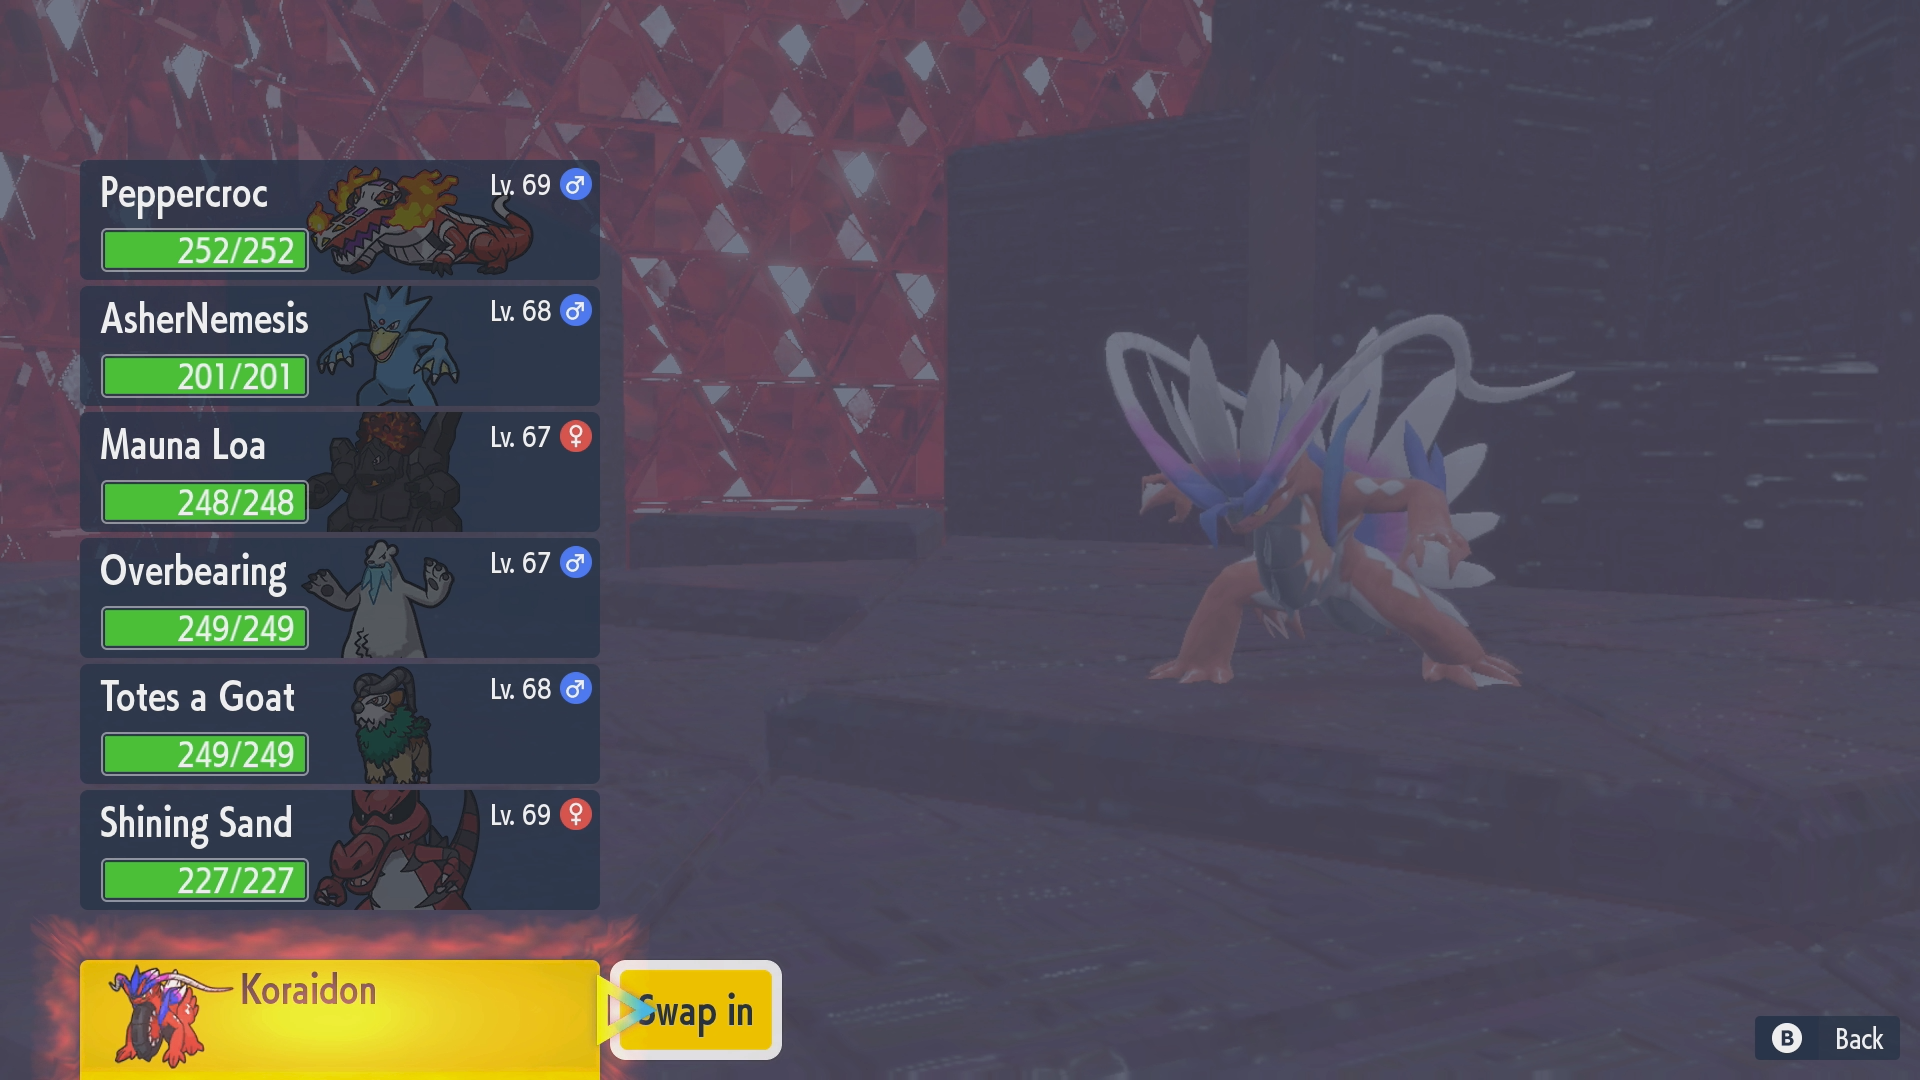

Choose to swap in your own Koraidon from the choice of Pokémon and it will be sent out, a cutscene will play, and then it will power up to its fully-powered form and fight for you in battle.
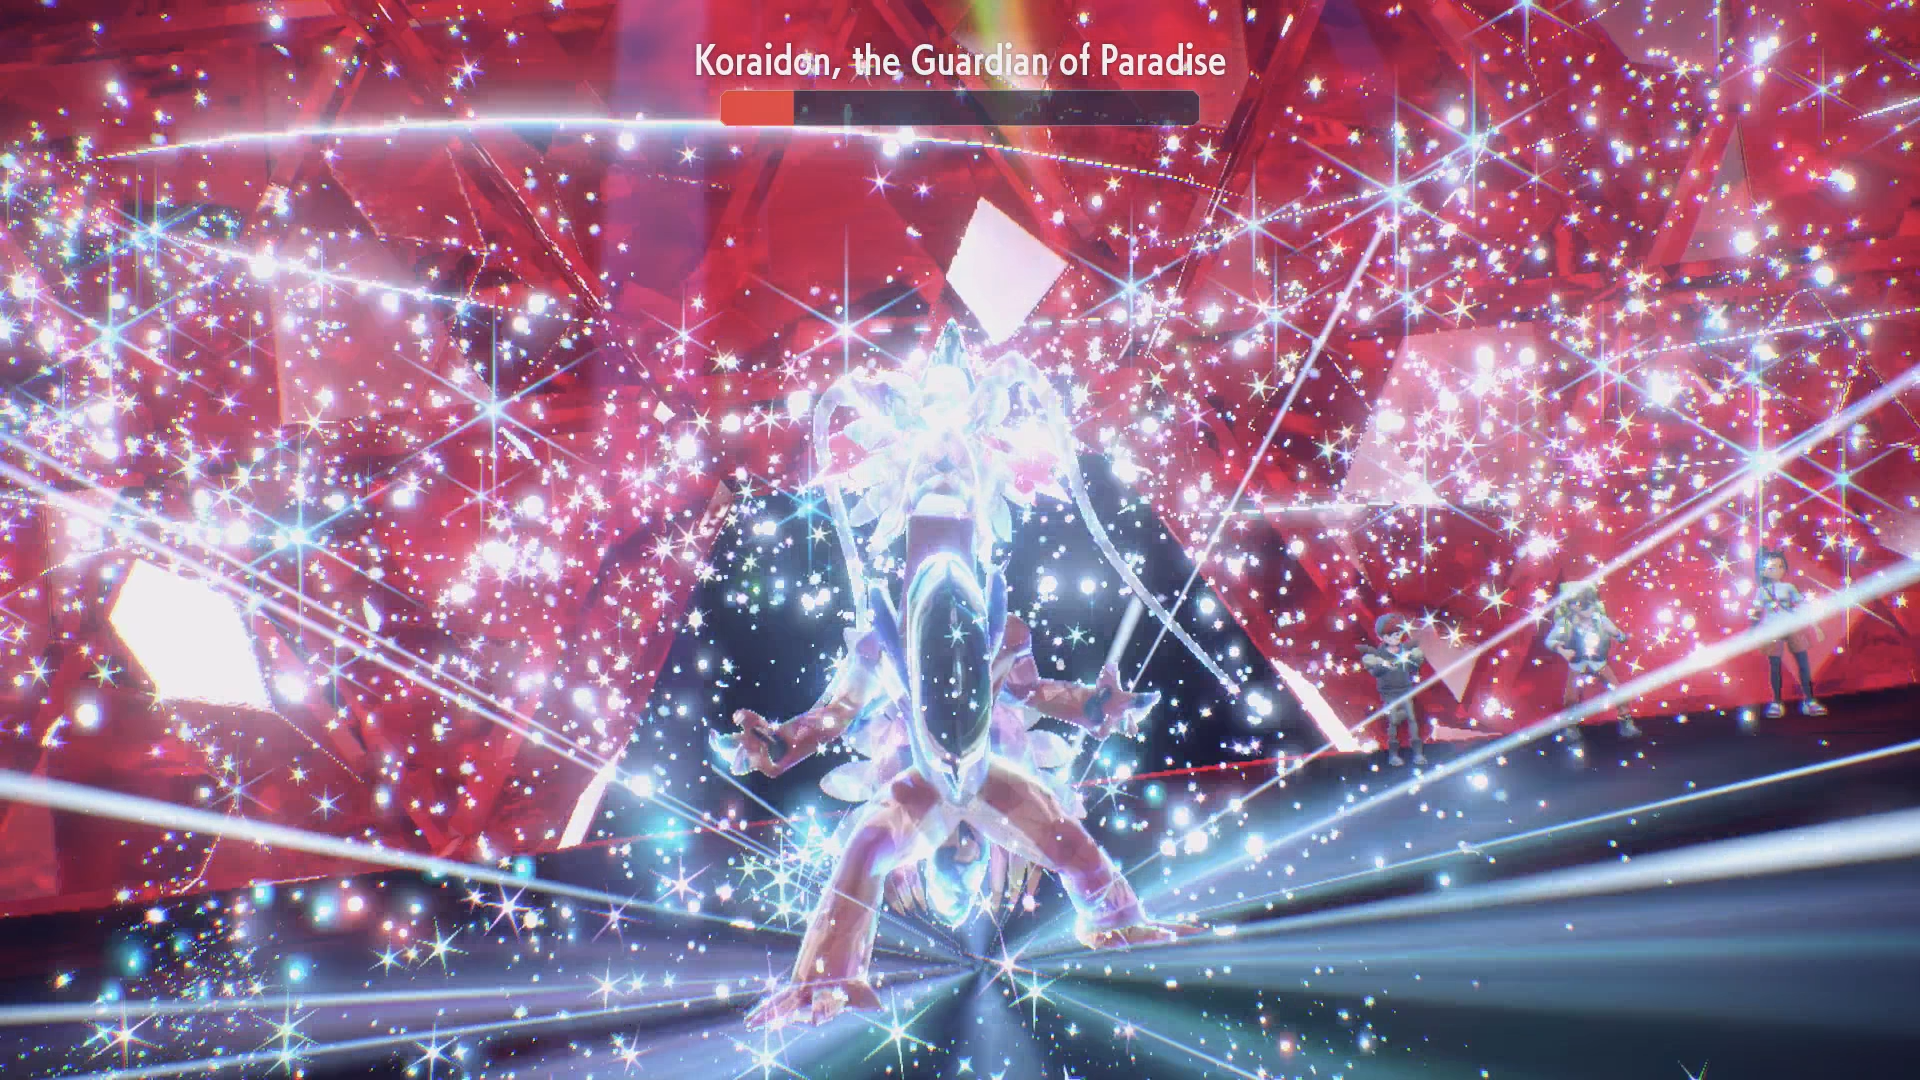
Thematically, it’s a very cool battle, but if you are worried about getting through it: don’t worry, you actually can’t lose, as your Koraidon will always stay alive with 1 HP left. Just Terastallize when you get the cue to and use Tera Blast to finish the job. You can use Endure, Flamethrower, or whatever else you want, but it doesn’t really matter—you cannot lose the fight.
After you’ve defeated Koraidon, the Guardian of Paradise, and stopped the Paradise Protection Protocol, you’ll have another touching moment with the last bit of humanity that AI Sada has left. She’ll activate the time machine one final time, this time to send her far to the past, where she can continue the Professor’s research on the ancient Pokémon while permanently closing the time machine in the present, resolving the threat of danger befalling Paldea.

After some more cutscenes and conversations with your friends, outside of Area Zero, the credits will roll and you’ll be treated to some Ed Sheeran music.
Congratulations, you’ve beaten Pokémon Scarlet!
Your time in Paldea isn’t over yet, though, as there’s plenty of stuff that you can do in the postgame, such as rematching the Gym Leaders, fighting in a tournament, and unlocking 6-star Tera Raids.