Because you can now see wild Pokémon in the overworld in Pokémon Scarlet & Violet, and because the Power Items recommended for EV Training are easily available, EV Training is pretty easy and straightforward in Scarlet & Violet.
This guide will go over how to get started with it, helpful things to know about EV Training in Scarlet & Violet, as well as which Pokémon to fight to raise your EVs. It is broken up into several sub-pages for each stat, which goes into a lot more detail about where to EV train each of those stats. There are also helpful EV Counter tools on those pages to make keeping track of your EVs very easy!
A Few Things to Know About EV Training in Scarlet & Violet
Compared to previous games, there are a few things that have changed that will affect EV Training, so if you’re following the base EV Training guide, you’ll want to keep the following in mind first:
- The Pokérus is unavailable in Scarlet & Violet! You are unable to contract or spread the Pokérus in these games, so any EV Training will have to be done without that.
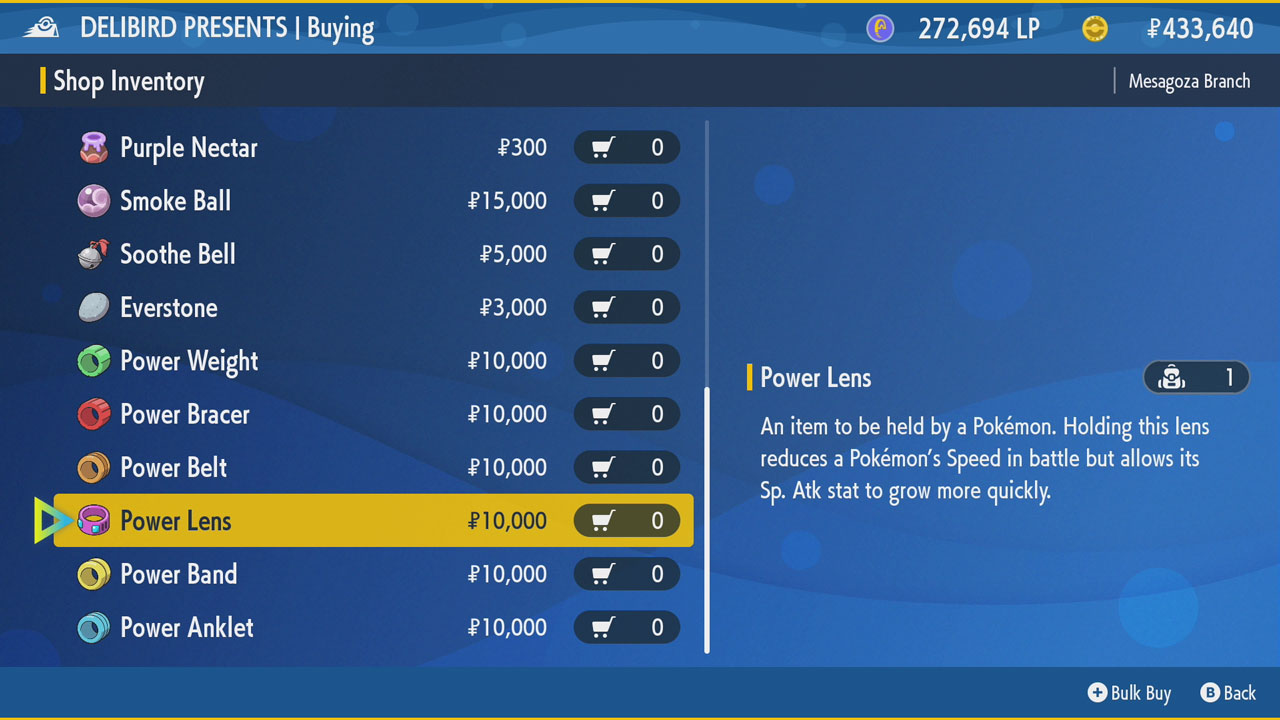
- Power Items are available and quite cheap! The Power Items you need for EV Training are available in Delibird Presents in Mesagoza. They cost just
 10,000 each, making them incredibly easy to afford (compared to requiring BP in previous games).
- Power Items also give +8 EVs to the stat they increase, just as it was in Sword & Shield. This means that something that naturally provides 1 EV in the matching stat gives 9 EVs, and something that provides 2 EVs gives 10 EVs.
- Your entire team gets EVs after each fight! Because your whole team gains Exp. Points whenever you catch or defeat a Pokémon, your whole team also earns EVs as well. This is something you want to keep in mind—make sure you only have Pokémon that need the EVs you are gaining in your party! However, this also means you can EV Train multiple Pokémon quite easily at the same time.
- Putting Power Items on inactive Pokémon will give them the +8 EV benefit, so you can use a fully EV-trained, level 100 Pokémon to fight whatever you want and help train up the rest of the team.
- You can use Vitamins all the way to 252 EVs! As with Sword & Shield, you can use Vitamins (or Feathers) on a Pokémon even if it has more than 100 EVs in a stat, so if you have the money for it, you can just buy Vitamins to raise your Pokémon’s EVs to the desired amount. There are also all sorts of Feathers you’ll pick up that can increase your EVs by a single point, which can be used to top off your EVs.
- However, this can be rather costly, at up to 510,000 (or LP) per fully maxed out Pokémon, so this may not be something you want to do as it might be quicker just doing it the old fashioned way compared to grinding the money back up.
- However, this can be rather costly, at up to
- Auto-battling does NOT give EVs! If you send out your lead Pokémon using the R button, it does not give you EVs when you knock things out with it! You’ll gain Exp. Points, but you won’t gain EVs. This is good to know, as it would be unfortunate if you accidentally knock something out that you weren’t intending to fight, so you won’t have to worry about that happening, but that also means you’ll have to fight the old fashioned way in order to actually gain EVs.
- It takes 28 battles (with a 1 EV Pokémon) while holding a Power Item to reach 252 EVs in a stat! Assuming you’re starting at 0 EVs, it takes exactly 28 battles to max out a particular stat. You’ll gain 9 EVs per fight that way. If you fight a Pokémon with a base of 2 EVs in the stat, you’ll gain one extra EV (10 EVs per fight), which doesn’t really speed things up all that much—26 battles instead of 28—so focusing on Pokémon that give just 1 EV is fine…
- …but focusing on base 2 EV Pokémon is easier for counting for specific EV amounts because, let’s say you need 228 EVs in a stat, well you can quickly figure out you need to fight 22 times with the Power Item equipped (10 EVs each, so 10 times 22 = 220) and then 4 times without it equipped (to get the remaining 8), but if you’re just going for 252 EVs, it’s fine going for base 1 EV Pokémon.
- Use your moves’ PP to keep track of KOs! A good way to keep count of how many Pokémon you’ve KO’d for EV Training is to use a Pokémon that has at least 30 PP across all of its moves that it can use to reliably one-hit KO the Pokémon you are fighting for EV Training for a single stat (assuming you are going for 252 EVs; otherwise, adjust accordingly). As long as you don’t heal or take a picnic, you’ll be able to see how many PP you’ve used in your moves and you’ll know when to stop if you’ve used 28 PP (for base 1 EV Pokémon) or 26 PP (for base 2 EV Pokémon).
- Of course, you can use the EV Counter tool on any of the individual stat pages to keep track as well, but this is a good backup method just in case you forget to add a knock out.
Alright, now that these basic concepts are explained, let’s get to the preparations!
Preparing for EV Training
First of all, you’ll want to decide what EV spread you want for your Pokémon. It’s a good idea to plan this out in advance, write it down somewhere, and then figure out how many fights total you’ll need (or how many vitamins/feathers you’ll need to use). For instance, for a starter Physical sweeper spread, something like 252 Attack, 252 Speed, and 6 HP is common. However, keep in mind that Speed is not as useful for Tera Raid Battles as survivability is, so if you’re EV Training for those, you’ll probably want to go with 252 Attack/Sp. Atk, 252 HP, and then 6 of something else as a beginner spread.
Train up one stat at a time, so pick one stat and then start with that, then move on to the next stat, and so on until you’re done. You might want to turn off auto-save from the Settings menu just in case you fear you might miscount or fight something else accidentally.
Eat Food for Encounter Power
One strongly recommended thing you can do to speed things up is to make sandwiches at a picnic to boost the encounter rate for Pokémon of the type you are EV Training against—however, not everyone wants to be bothered to make sandwiches, so you can also just eat at a restaurant or food stand if you don’t want to make a sandwich. The effect of this meal power is Encounter Power, and there is a different Encounter Power for each type, as well as three levels of it—level 1 is usually sufficient in most instances.
For instance, if you are training Attack and want to fight Shinx in an area in order to gain it, eating a sandwich from the Picnic menu with Encounter Power: Electric will make it more likely to find Shinx. Better yet, you can just go to a restaurant and order something with that effect, although there are a few Encounter Powers with missing types in restaurants/food stands, so you’ll have to make a sandwich if you want that boost.
Sandwich or food recommendations will be included throughout the EV Training Guide, with a preference towards avoiding sandwiches and using restaurants/food stands instead. This guide also considers the best Pokémon to EV Train against that benefit from a boost, because ideally you’ll want to find Pokémon that don’t have any other Pokémon with the same type in the area, otherwise they’ll get the Encounter Boost effect as well, and that’s not good!
EV Reducing Berries

Some very useful things to have handy while EV Training are the EV reducing berries. There is a berry for each of the six stats, and when you feed a Pokémon one of those berries, it lowers the Pokémon’s EVs for the respective stat by 10 EVs per berry. This is a decent way to fix any mistakes you might have made while EV Training or to fully reset an in-game Pokémon’s EVs to hopefully make it usable.
- Pomeg Berry lowers HP EVs.
- Kelpsy Berry lowers Attack EVs.
- Qualot Berry lowers Defense EVs.
- Hondew Berry lowers Special Attack EVs.
- Grepa Berry lowers Special Defense EVs.
- Tamato Berry lowers Speed EVs.
You can get these berries as Tera Raid Battle rewards, you can find them on the ground, you can sometimes find them while picnicking and searching the basket, but one of the best places to get the EV resetting berries is in the Porto Marinada auctions. They often go on sale here and you can pick up 30–80 or more for a very affordable price—usually only around less than ![]() 100 per berry. The auctions reset their available items every in-game day, not every real-world day, so just stop by every hour or so of gameplay to see if they have any for sale and just buy them. Even if you don’t need them right away, they’ll be useful later on.
100 per berry. The auctions reset their available items every in-game day, not every real-world day, so just stop by every hour or so of gameplay to see if they have any for sale and just buy them. Even if you don’t need them right away, they’ll be useful later on.
What If I Run Into a Shiny Pokémon?
Also, since you’ll be fighting a lot of wild Pokémon and will also see many more as you’re EV Training, there is the possibility you encounter a Shiny Pokémon while EV Training. Catching Pokémon gives you EVs! Keep this in mind with counting EVs. However, since there are only 508 usable EVs, you actually have 2 EVs that don’t end up being used due to rounding, so you’ll only gain 1 or 2 points in a stat you don’t care about and it shouldn’t mess up your EV Training, even if you don’t know what EVs it gives. Better yet, you can just use an EV reducing berry on the stat(s) the Shiny Pokémon yield, and then try to course correct it from there.
Checking Your EVs
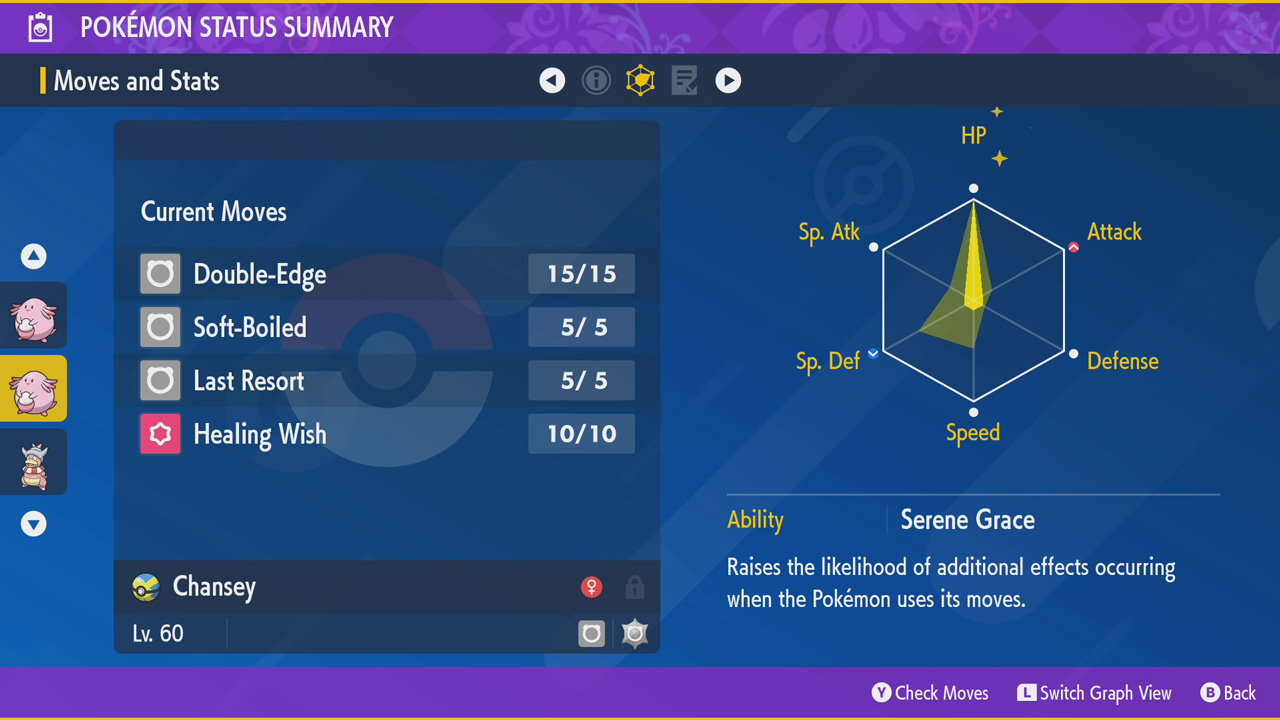
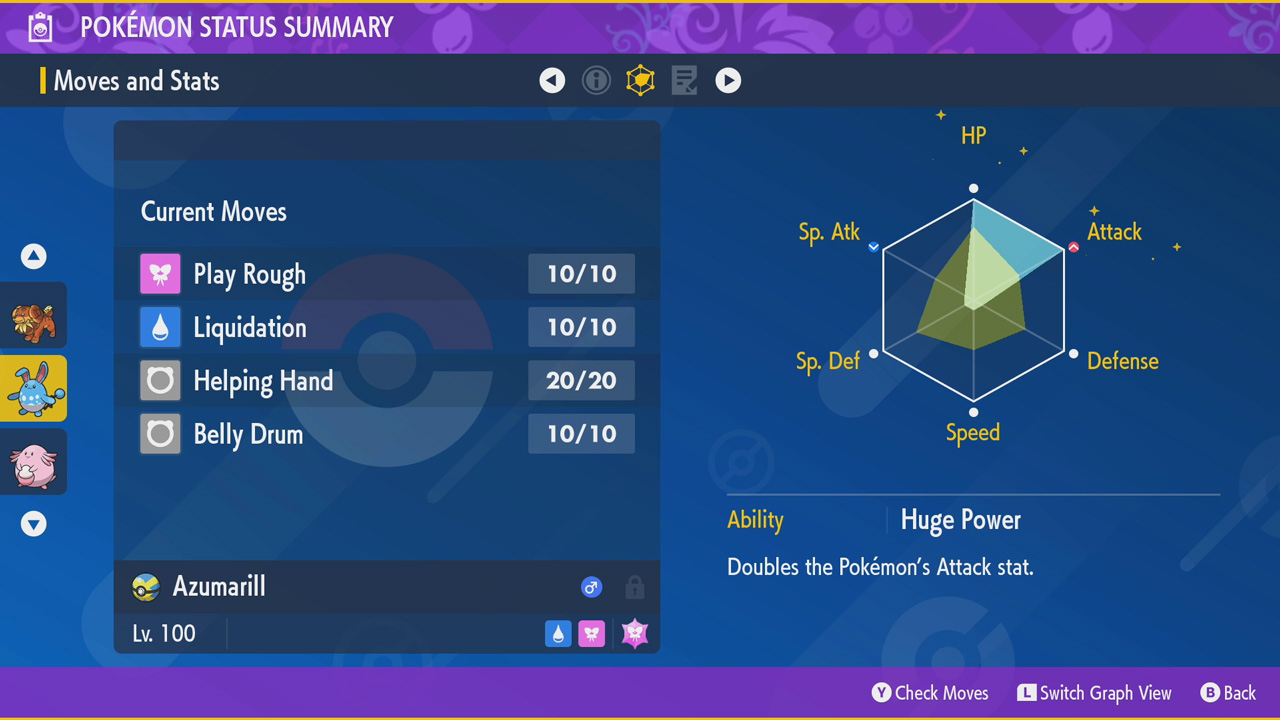
Although you can’t see exactly how many Effort Values your Pokémon has, you can get a rough idea and can also see if you’ve maxed out either an individual stat or have reached the cap of 510 EVs. To do this, view the status summary of the Pokémon, scroll over to the Moves and Stats tab, and then press L to toggle the EV mode (shown above).
You’ll see a radar graph showing the Pokémon’s stats and total EVs—the stats are marked with a fainter yellow, while EVs are either a brighter yellow or a light blue in front of the stats. The “points” of this hexagon will expand towards the respective stat’s name as you gain EVs in that stat. If you’re looking at a non-EV Trained Pokémon, it will probably be all over the place, but if you are looking at EV Trained Pokémon or Pokémon that you are in the process of EV Training, it can be good to see where they’re at.
On top of that, once you’ve maxed out a stat, you’ll see little sparkles by the stat name to indicate it is at 252 EVs in that stat. Lastly, once you have hit the cap of 510 EVs on that Pokémon, the radar graph will turn light blue instead of yellow. This is a good way to know when you’re finished, either with a single stat (if you’re going for 252 EVs) or for the entire EV spread.
Getting the Effort Ribbon
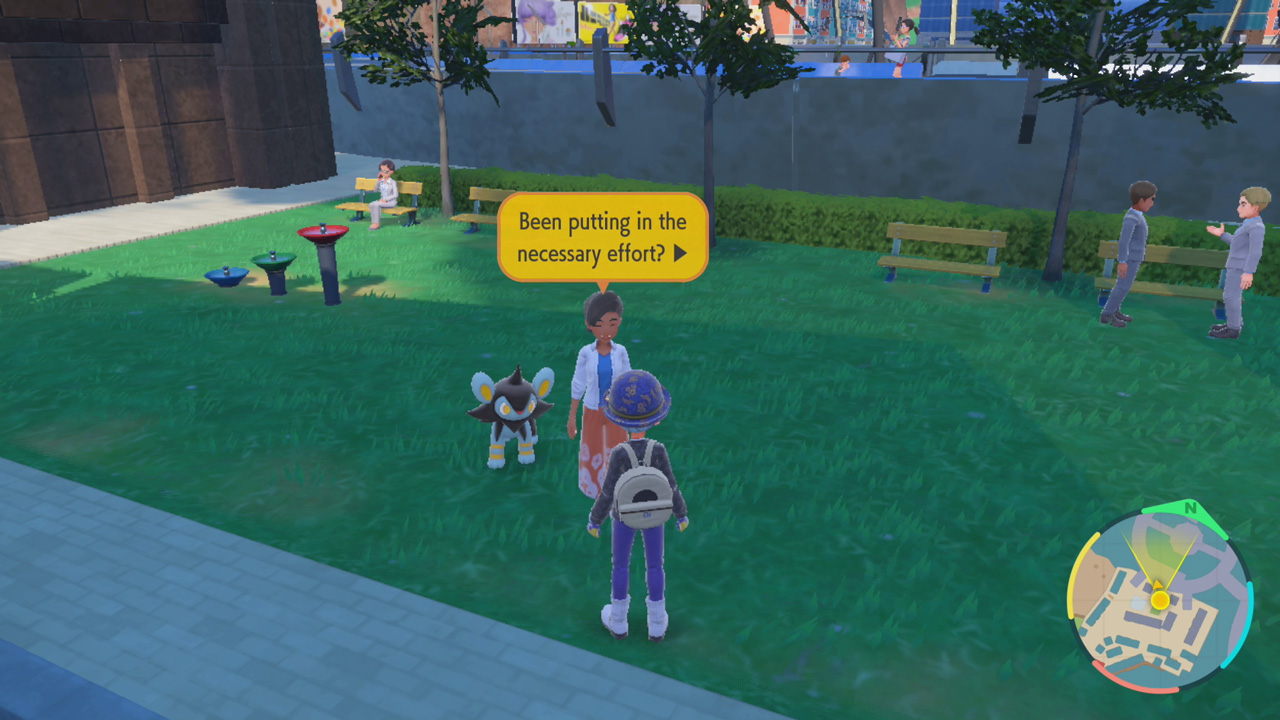

After you’ve maxed out you’re Pokémon’s EVs to their maximum of 510 EVs total, you can go to Levincia and speak with a lady with a Luxio to show her a Pokémon. (She is in the park directly south of the big “ring” in the center of town.) If it has 510 EVs total across all stats, she’ll give it the Effort Ribbon, which can be used to signify you’ve maxed its EVs out, at least at one point in time—you can still remove its EVs with berries if you need and it will keep the Ribbon.
EV Training Your Pokémon
Ok, now for the fun part: actually EV Training your Pokémon! With so many different training options available in Pokémon Scarlet & Violet, it’s not so easy as simply “go here, fight this” like in previous games. Well, not without this guide, it isn’t! Thankfully this EV Training Guide should give you good suggestions for all six stats, and with a variety of different options for each stat to account for Exp. Points, difficulty, and more.
As previously stated, there are dedicated sub-pages for each stat and each of these sub-pages has its own EV Counter tool to help you keep track of your EVs as you go. If you are looking for a better explanation of what to train against for any stat, you’ll want to check out the sub-pages, which also list all of the Pokémon that give only that EV, so it can be useful if you have outbreaks.
Otherwise, you’ll find a good general summary of recommended training spots for each of the stats down below!
Where to EV Train HP
Quick Recommendations
| Image | Pokémon |
|---|---|
| Azurill Use Encounter Boost: Fairy Found alongside the river south of Los Platos 1 base EV 9 EVs w/ Power Weight 28 KOs w/ Power Weight to 252 EV | |
| Chansey Use Encounter Boost: Normal (sandwich) Area Zero, Secret Cave for high Exp. Points; south of Team Star Fairy Base for encounters 2 base EV 10 EVs w/ Power Weight 26 KOs w/ Power Weight to 252 EV | |
| Marill Use Encounter Boost: Fairy Found south of Levincia 2 base EV 10 EVs w/ Power Weight 26 KOs w/ Power Weight to 252 EV |
(Don’t forget the EV Counter tool is available on the link above for keeping track of your HP EVs, as well as more options!)
Chansey (high-level, 2 base EV)
![]()
Chansey is a great Pokémon not just for EV Training, but also for gaining Exp. Points, since it gives a lot of Exp. Points when you knock it out. Chansey gives 2 base HP EVs when defeated, meaning you’ll get 10 HP EVs per Chansey with a Power Weight equipped.
Unfortunately there is no restaurant or food stand meal that gives Encounter Power: Normal, but you can easily make a Ham Sandwich (#80) to get the Normal boost. You can then find Chansey in several locations, but two worthwhile locations are:
- Area Zero, in the Secret Cave (you can get here from Research Station No. 3, take a left and head all the way to the second tree you see past a rocky arch, then take a left and look around some boulders for the entrance). This has level 55 Chansey and are the highest level, but there are other spawns.
- South of the Team Star Fairy Base, in the flowery fields and along the path. They appear far more frequently here, but you’ll get less Exp. Points from knocking them out.
It takes a total of 26 Chansey to go from 0 EVs to 252 EVs assuming you’re holding the Power Weight.
Azurill (low-level, easy, 1 base EV)
![]()
In South Province (Area One), near the beginning of the game, there is an extremely easy EV Training spot if you’re looking to train HP. Azurill gives 1 base HP EV when defeated, meaning you’ll get 9 HP EVs each with a Power Weight equipped.
Being a Fairy-type, it gets a boost from anything with Encounter Power: Fairy, and you can either make a sandwich for it or you can just buy Grilled Rice Balls from Chic Kebab (south-center area of Mesagoza) or Fruit Punch from the Go-for-Broke Grill.
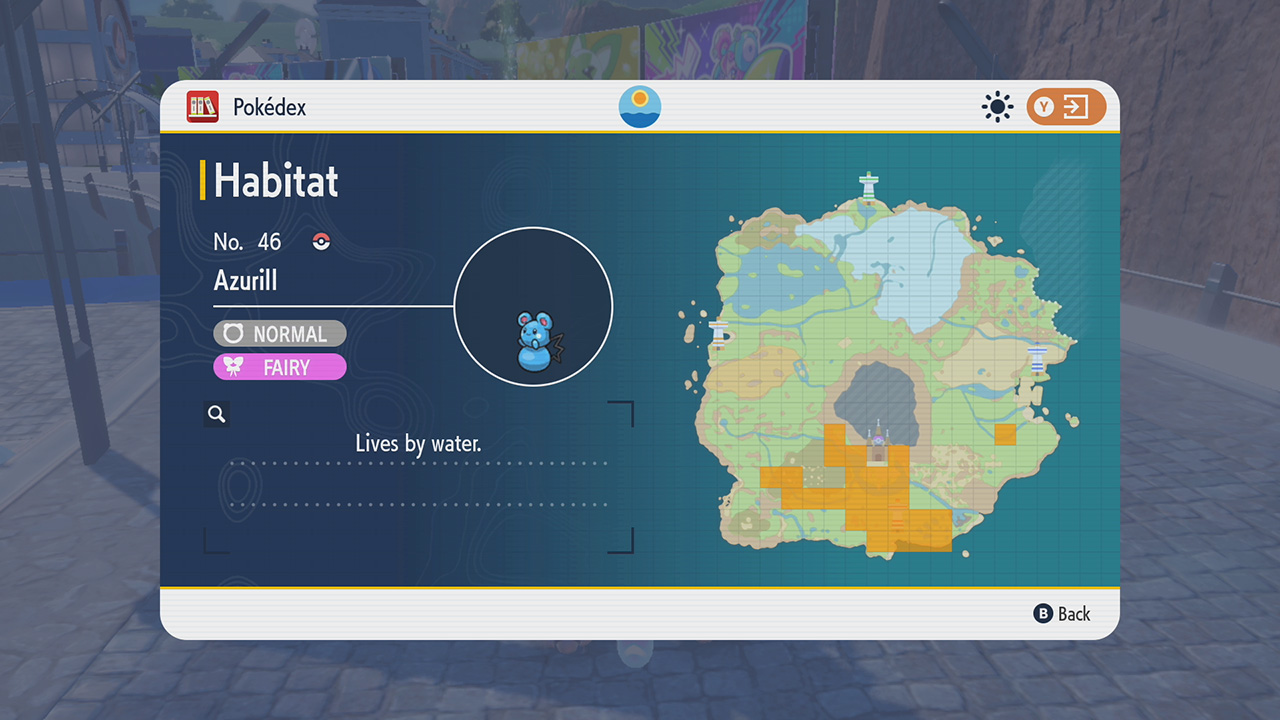

There’s a bridge north of the Poco Path Lighthouse that leads to Los Platos, but you can find a lot of Azurill along the river that the bridge crosses. You can also feel free to knock out any Lechonk or Paldean Wooper you find, as they give the same amount of EVs, but Azurill is definitely the easiest to encounter.
It takes a total of 28 Azurill (or Lechonk or Paldean Wooper) to reach 252 HP EVs from 0 while holding a Power Weight. You will also gain almost no Exp. Points in the process due to these Pokémon being very low level.
Where to EV Train Attack
Quick Recommendations
| Image | Pokémon |
|---|---|
| Shinx Use Encounter Boost: Electric Found east of Mesagoza 1 base EV 9 EVs w/ Power Bracer 28 KOs w/ Power Bracer to 252 EV | |
| Flamigo / Paldean Tauros Use Encounter Boost: Fighting Flamigo is very common at Casseroya Watchtower No. 1 at high levels, or in South Province (Area One) near the Grasswither Shrine at low levels Paldean Tauros is south of Levincia 2 base EV 10 EVs w/ Power Bracer 26 KOs w/ Power Bracer to 252 EV |
(Don’t forget the EV Counter tool is available on the link above for keeping track of your Attack EVs, as well as more options!)
Shinx / Yungoos (low-level, easy, 1 base EV)
![]()
![]()
Directly to the east of Mesagoza, from the stretch between the East Gate and the South Province (Area Three) Pokémon Center, you can find two Pokémon in particular that each give a base 1 Attack EV—Shinx and Yungoos. These give 9 Attack EVs each if knocked out (or caught) while holding the Power Bracer.
You will have a particularly easy time finding Shinx in particular if you eat some food that grants Encounter Power: Electric. The Klawf al Ajillo in Go-For-Broke Grill in the southwest part of Mesagoza or a storebought Avocado Sandwich in Every Wich Way in Mesagoza will grant that effect, otherwise you can make a sandwich.

This causes a lot of Shinx to appear along the road between the East Gate and the Pokémon Center, so just run along it, fighting against any and all Shinx you find there. Yungoos may also appear and you may feel free to knock them out, too, as they give the same amount of EVs.
It takes a total of 28 Shinx or Yungoos to reach 252 Attack EVs from 0 while holding a Power Bracer. These also give almost no Exp. Points due to being at a very low level.
Flamigo or Paldean Tauros (various levels, 2 base EV)
![]()
![]()
There are not just one, but two options for EV Training Attack: Flamigo and Paldean Tauros (any breed). They both give 2 base Attack EVs or a total of 10 Attack EVs if you have the Power Bracer equipped. This means it will take you 26 Flamigo or Paldean Tauros to go from 0 EVs to 252 EVs while using the Power Bracer. It’s also important to note that Paldean Tauros only gives Attack EVs—if you see reports of Tauros giving 1 Attack and 1 Speed EV, that’s for Kantonian Tauros (which cannot be found in the wild).
You’ll want to eat a Tropical Sandwich for sale in Every Wich Way to get Encounter Boost: Fighting, or you can make a sandwich for that effect.
Flamigo can be found most commonly by flying to Casseroya Watchtower No. 1, though at a high level (around level 50); otherwise, for lower-level Flamigo, you can go to the lake east of Los Platos. You can also fight against Paldean Tauros (any breed) in the plains south of Levincia or east of Porto Marinada.
Where to EV Train Defense
Quick Recommendations
| Image | Pokémon |
|---|---|
| Scatterbug / Tarountula Use Encounter Boost: Bug (sandwich) Found south of Mesagoza 1 base EV 9 EVs w/ Power Belt 28 KOs w/ Power Belt to 252 EV | |
| Orthworm Use Encounter Boost: Steel (sandwich) Found in Asado Desert 2 base EV 10 EVs w/ Power Belt 26 KOs w/ Power Belt to 252 EV |
(Don’t forget the EV Counter tool is available on the link above for keeping track of your Defense EVs, as well as more options!)
Scatterbug / Tarountula (low-level, easy, 1 base EV)
![]()
![]()
To the immediate south of Mesagoza and then a bit to the right are some large trees in a grassy, hilly field. Over there, you can find quite a few Scatterbug and Tarountula, and each of them have a base of 1 Defense EV—while holding the Power Belt, you’ll gain 9 Defense EVs per fight against either of them.
You’ll want to improve your chances of finding them by eating a meal that gives you Encounter Power: Bug, as you’ll be able to find plenty of them with that active, although they’re still reasonable to find even without that encounter rate boost. Unfortunately there are no restaurant or food stand meals that provide that boost, but a standard Cheese Sandwich (#84) gives Encounter Power: Bug Lv. 1 and should be more than sufficient.
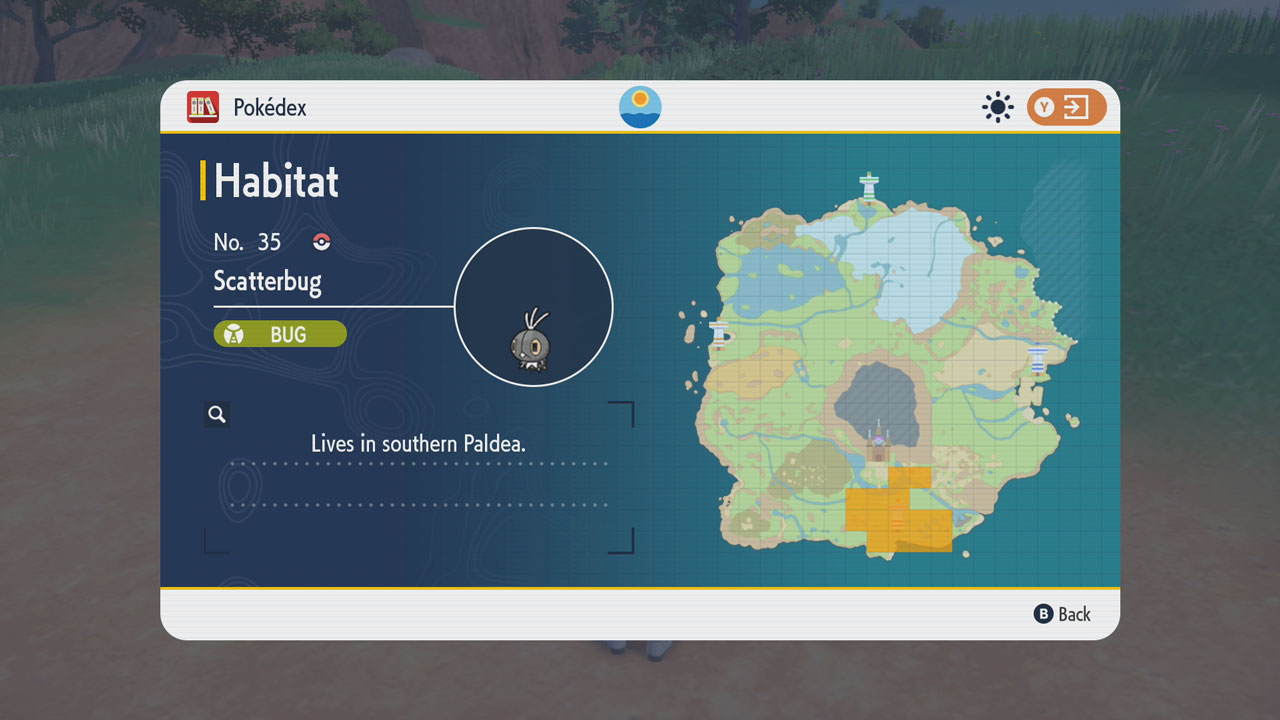
It takes a total of 28 Scatterbug/Tarountula to go from 0 EVs in Defense all the way up to 252 Defense EVs while holding a Power Belt. Scatterbug and Tarountula both give 1 base Defense EV (or 9 Defense EVs total with the Power Belt) and are both Bug-type, so both get a boost from Encounter Power: Bug, so feel free to fight either of them freely. They give almost no Exp. Points, though, due to being encountered so early in the game.
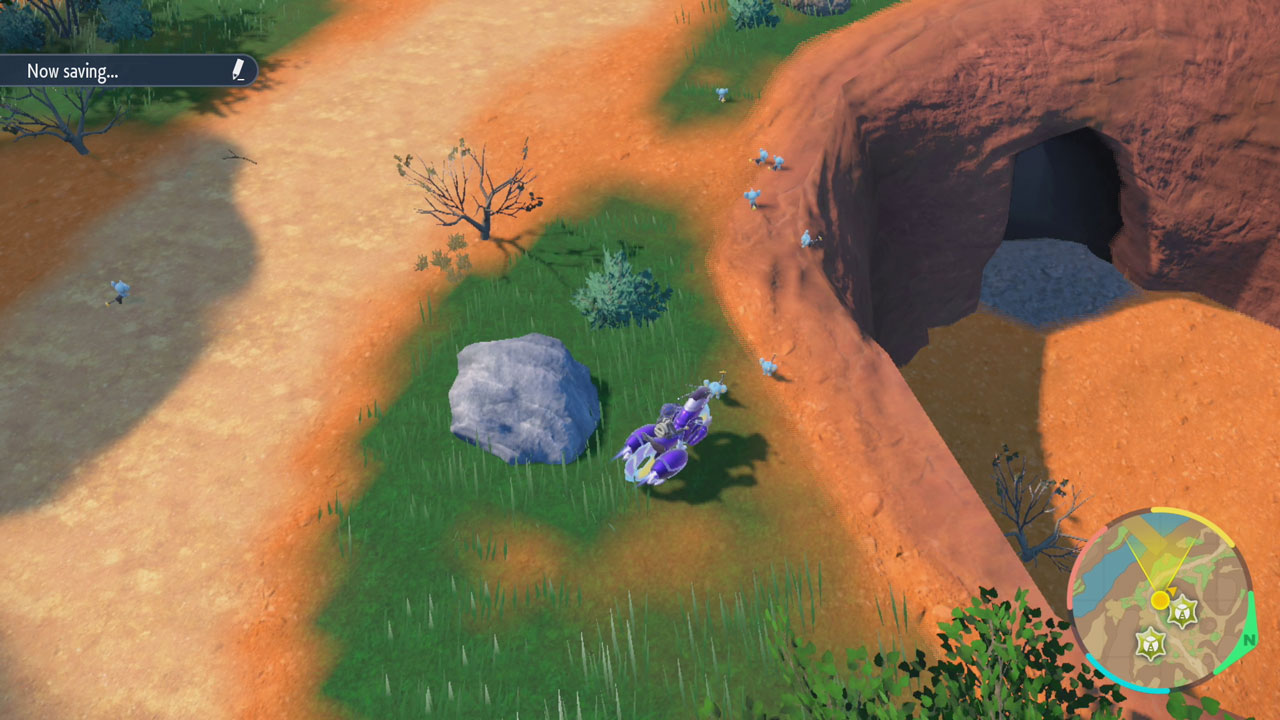
Orthworm (mid-level, 2 base EV)
![]()
Another very good option is Orthworm, which gives 2 base Defense EVs per knock out, or 10 Defense EVs while holding the Power Belt. You’ll need to knock out 26 Orthworm to go from 0 EVs to 252 EVs.
Although you might think of eastern Paldea when it comes to Orthworm, a better spot is actually the Asado Desert, especially if you have Encounter Power: Steel active. Unfortunately there are no restaurants or food stands that give this power, so you’ll have to make a sandwich for it—a Potato Salad Sandwich (#52) is ideal.
Where to EV Train Sp. Atk
Quick Recommendations
| Image | Pokémon |
|---|---|
| Psyduck Use Encounter Boost: Water Low-level ones are south of Los Platos, by the river 1 base EV 9 EVs w/ Power Lens 28 KOs w/ Power Lens to 252 EV | |
| Girafarig Use Encounter Boost: Psychic Mid-level are east of Porto Marinada; high-level are in Area Zero Don’t fight Farigiraf, as it does NOT give Sp. Atk EVs! 2 base EV 10 EVs w/ Power Lens 26 KOs w/ Power Lens to 252 EV | |
| Mareep Use Encounter Boost: Electric Low-level ones are west of Mesagoza Has Static, so use Special-based moves 1 base EV 9 EVs w/ Power Lens 28 KOs w/ Power Lens to 252 EV | |
| Flaaffy Use Encounter Boost: Electric East of Porto Marinada Has Static, so use Special-based moves 2 base EV 10 EVs w/ Power Lens 26 KOs w/ Power Lens to 252 EV |
(Don’t forget the EV Counter tool is available on the link above for keeping track of your Sp. Atk EVs, as well as more options!)
Psyduck (low-level, easy, 1 base EV)
![]()
You can find Psyduck all over the Paldea region, usually by rivers and lakes, so there are plenty of options for you to choose from. Ideally, unless you have the upgrade to ride on water, you’ll want to stick to shallow streams or ponds, otherwise getting to the Psyduck might be a pain. Psyduck give a base of 1 Sp. Atk EV when they’re knocked out or caught, or 9 Sp. Atk EVs per battle while holding the Power Lens.
Eating some food with Encounter Power: Water will help Psyduck appear more often, wherever you are. However, it usually is competing with other Water-type Pokémon, so you’ll need to avoid those and just go for Psyduck most of the time. You can buy a Chocolate Banana Crepe directly south of the center part of Mesagoza from one of the street vendors, which gives you Encounter Power: Water Lv. 1.
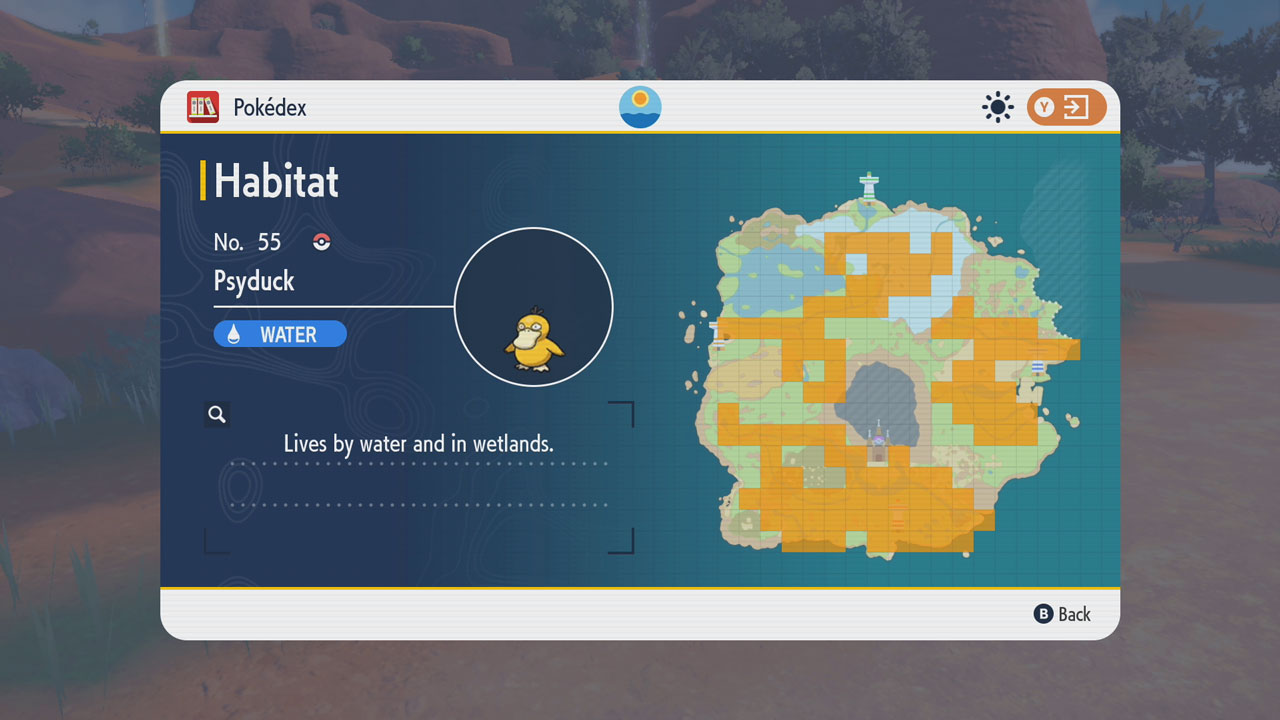

A decent place to fight against wild Psyduck is actually near the beginning of the game, just north of Poco Path Lighthouse. There’s a small stream that has a bridge along the path leading to Los Platos. With Encounter Power: Water active, Psyduck are very common along the stream; however, you’ll also find a lot more Buizel and the occasional Chewtle nearby as well, which you’ll need to avoid.
It takes a total of 28 Psyduck to reach 252 Sp. Atk EVs while holding the Power Lens, assuming you’re starting from 0 EVs. You won’t gain much Exp. Points from the ones in the starting area, but since these are all over the place, you can find a spot with higher-level ones without much difficulty.
Girafarig (mid- or high-level, 2 base EV)
![]()
A fantastic option that’s available in both a mid-level and high-level location is Girafarig. Girafarig gives a base of 2 Sp. Atk EVs when you knock it out or catch it, meaning you’ll get 10 Sp. Atk EVs if you have the Power Lens equipped. That means it will take a total of 26 Girafarig to reach 252 Sp. Atk EVs assuming you started at 0 and are holding the Power Lens. However, something important to note: Farigiraf does NOT give Sp. Atk EVs! ⚠ Don’t knock out Farigiraf if you see any! ⚠
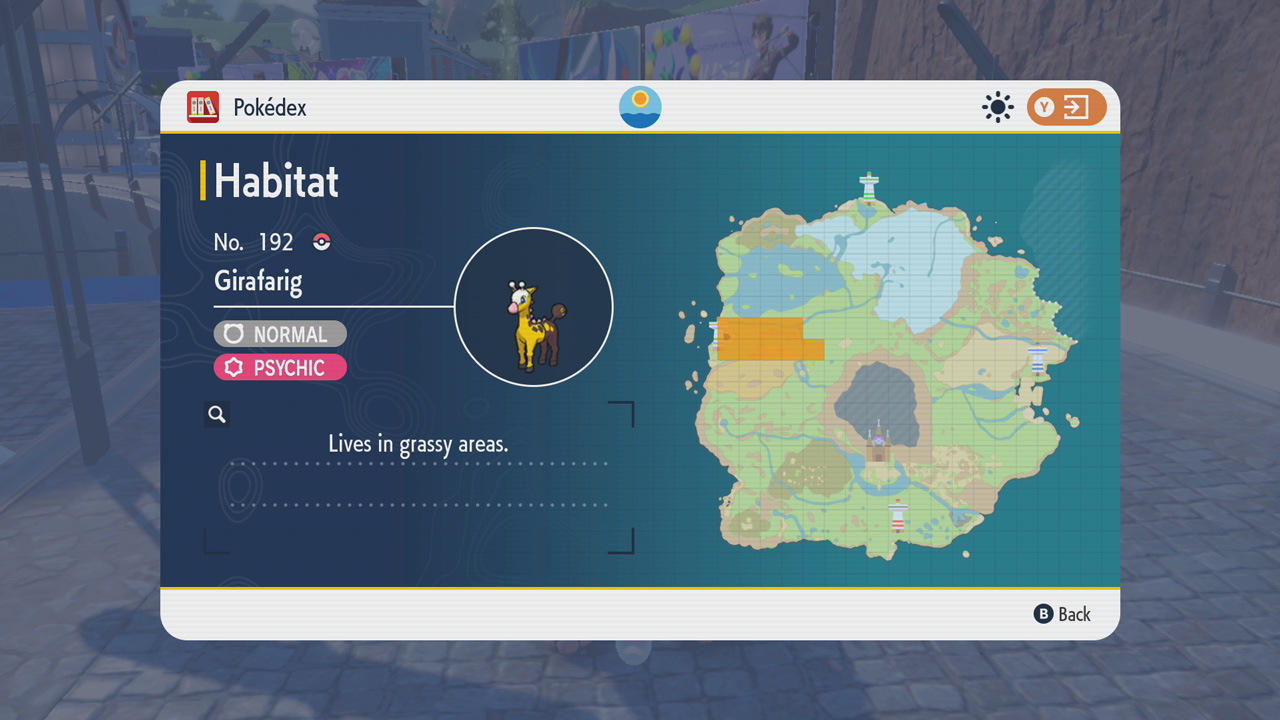
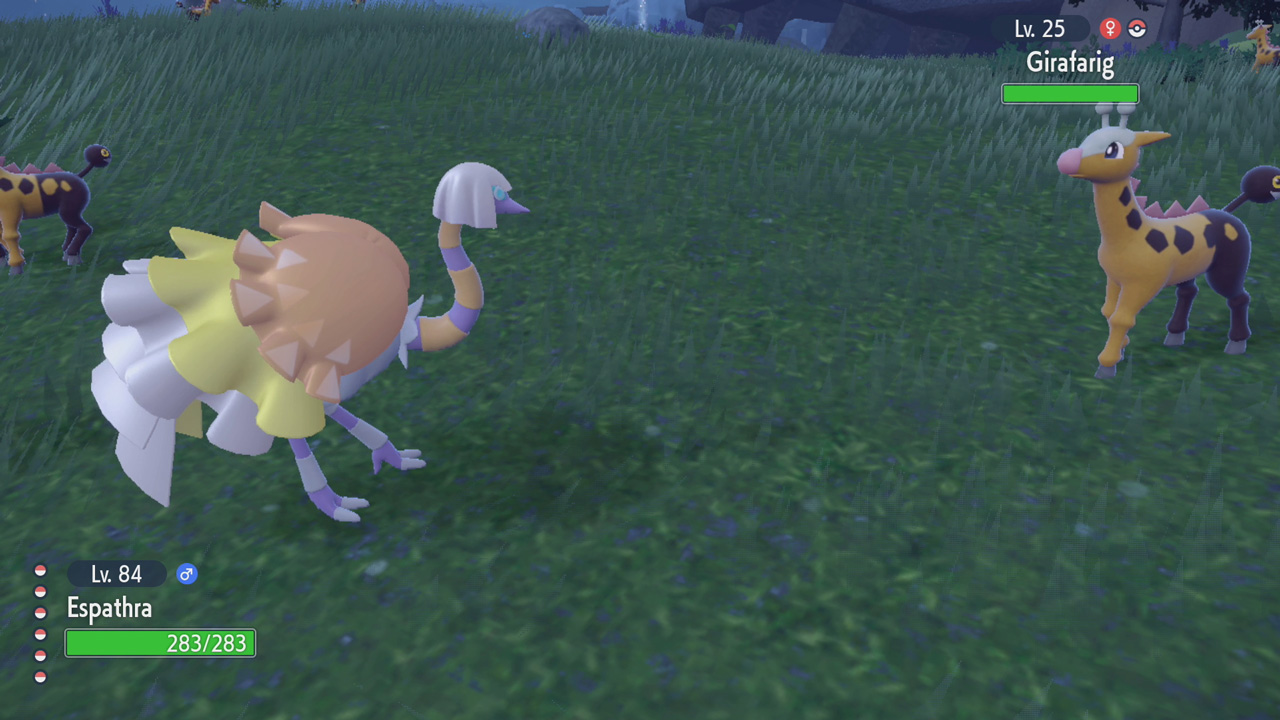
To have the best chances of running into Girafarig, eat some food that contains Encounter Power: Psychic. You can buy a Chocolate Churro in a food stand near the east gate of Mesagoza and that gives Encounter Power: Psychic Lv. 1.
If you want to find mid-level Girafarig, you can find them all over the place east of Porto Marinada; otherwise, if you want high-level Girafarig, go to Area Zero and you should find plenty of Girafarig roaming around outside (avoid all Farigiraf you find there, as they give 3 HP EVs instead and will disrupt your EV Training).
Where to EV Train Sp. Def
Quick Recommendations
| Image | Pokémon |
|---|---|
| Spoink Use Encounter Boost: Psychic Found east of Mesagoza 1 base EV 9 EVs w/ Power Band 28 KOs w/ Power Band to 252 EV | |
| Floette Use Encounter Boost: Fairy Found in Area Zero (high-level) 2 base EV 10 EVs w/ Power Band 26 KOs w/ Power Band to 252 EV | |
| Gothorita Use Encounter Boost: Psychic Found outside of Alfornada (high-level) 2 base EV 10 EVs w/ Power Band 26 KOs w/ Power Band to 252 EV |
(Don’t forget the EV Counter tool is available on the link above for keeping track of your Sp. Def EVs, as well as more options!)
Spoink (low-level, easy, 1 base EV)
![]()
Spoink are fairly commonly found just outside of the east gate of Mesagoza, along the pathway to the Pokémon Center further east and in the nearby area, plus they are among the only Psychic-type Pokémon in the area, which makes them easy to find in mass numbers with the use of an Encounter Power: Psychic meal. Spoink give a base of 1 Sp. Def EV when knocked out or caught, so while holding the Power Band, you’ll gain a total of 9 Sp. Def EVs per fight.
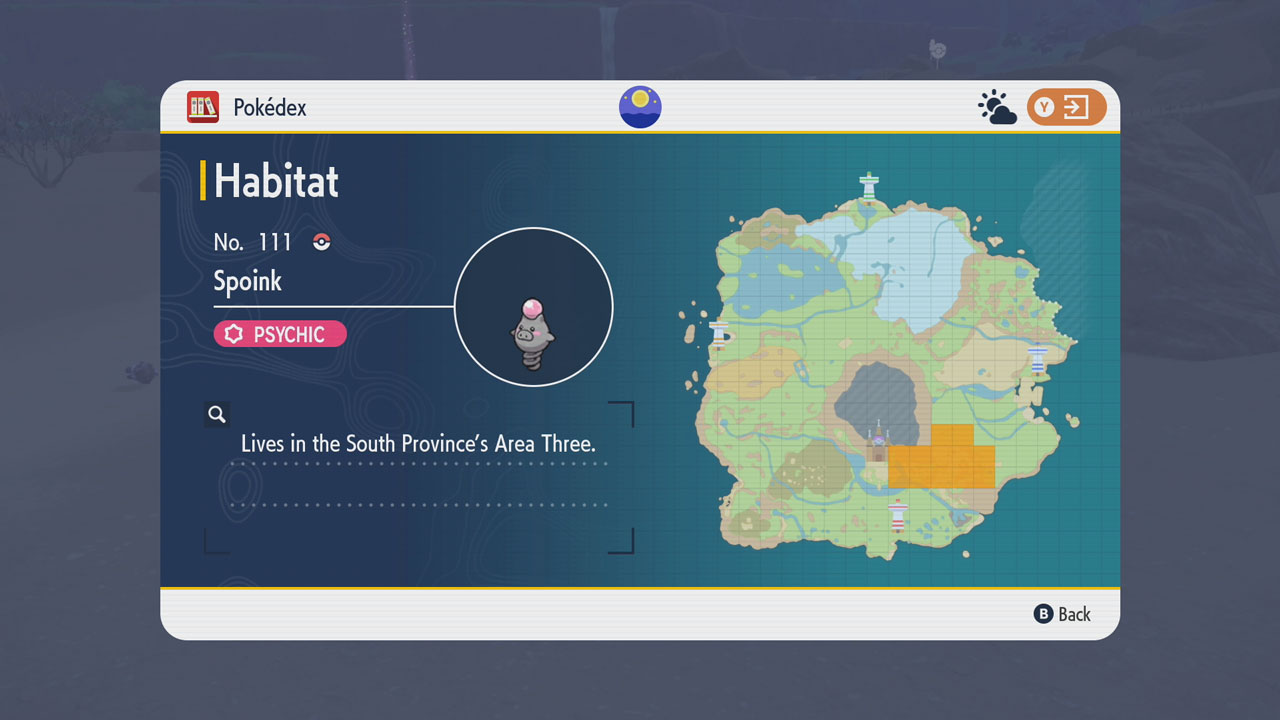

You can buy a Chocolate Churro in Mesagoza at a food stand by the east gate to get Encounter Power: Psychic Lv. 1, which should be more than enough to find Spoink, or you can make a sandwich. As for finding Spoink, you’ll have no difficulty finding them with the boost active in the aforementioned area: east of Mesagoza, directly outside of the gate and all the way along the path to the Pokémon Center.
It takes a total of 28 Spoink to reach 252 Sp. Def EVs starting from 0 EVs, assuming you’re holding the Power Band. This means you get 9 Sp. Def EVs per fight. You don’t gain much Exp. Points this way, but it’s quite reliable.
Floette (high-level, 2 base EV)
![]()
If you’ve already beaten the game and are looking for something that gives a lot more Exp. Points, there are a few options waiting for you in Area Zero, but Floette is common down there (with Encounter Power: Fairy active) and gives a base of 2 Sp. Def EVs when you knock it out or catch it, so that’s 10 Sp. Def EVs total per fight. These are Fairy-type Pokémon at levels 55–59 or so, so a strong Poison-type Pokémon—ideally Physical-based—will be your best bet.
You’ll want to have Encounter Power: Fairy from a meal while tracking these down, which you can make a sandwich for yourself, or you can just buy Grilled Rice Balls from Chic Kebab‘s stand in the south-center area of Mesagoza or from the Fruit Punch in the Go-for-Broke Grill, also in Mesagoza. You also want to make sure you’re above ground and outside of a cave in Area Zero.
It takes a total of 26 Floette to go from 0 EVs up to 252 Sp. Def EVs while holding the Power Band. Floette give 10 Sp. Def EVs with the Power Band equipped.
Where to EV Train Speed
Quick Recommendations
| Image | Pokémon |
|---|---|
| Fletchling / Rookidee Use Encounter Boost: Flying Found south of Mesagoza 1 base EV 9 EVs w/ Power Anklet 28 KOs w/ Power Anklet to 252 EV | |
| Cyclizar Use Encounter Boost: Dragon Found south of Levincia or east of Porto Marinada 2 base EV 10 EVs w/ Power Anklet 26 KOs w/ Power Anklet to 252 EV | |
| Jumpluff Use Encounter Boost: Grass (sandwich) Found in Area Zero 3 base EV 11 EVs w/ Power Anklet 23 KOs w/ Power Anklet to 252 EV |
(Don’t forget the EV Counter tool is available on the link above for keeping track of your Speed EVs, as well as more options!)
Fletchling / Rookidee (low-level, easy, 1 base EV)
![]()
![]()
If you’ve played any amount of Pokémon Scarlet or Violet, you’ve no doubt seen a bunch of these birds around, particularly around the starting areas. Thankfully, they’re great for EV Training your Speed, as both Fletchling and Rookidee give a base of 1 Speed EV. While holding the Power Anklet, this means you’ll gain a total of 9 Speed EVs per battle, and it takes a total of 28 Fletchling or Rookidee to go from 0 EVs to 252 EVs with the Power Anklet equipped.
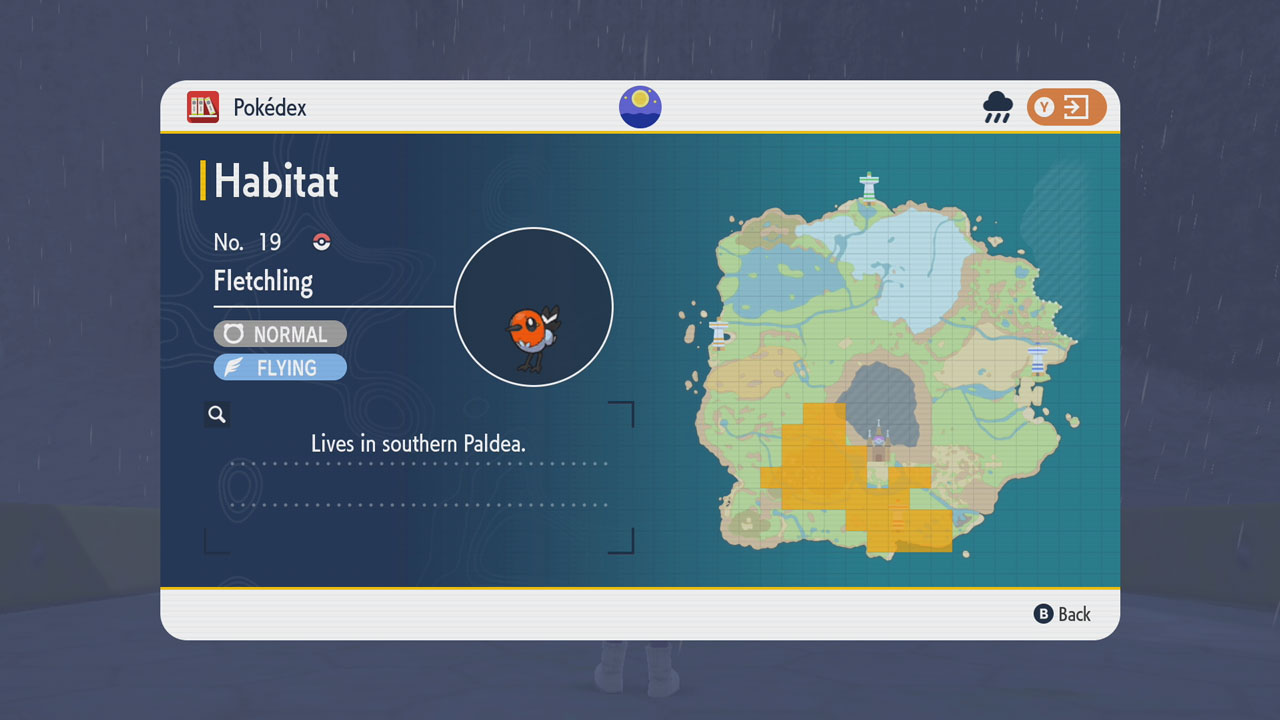
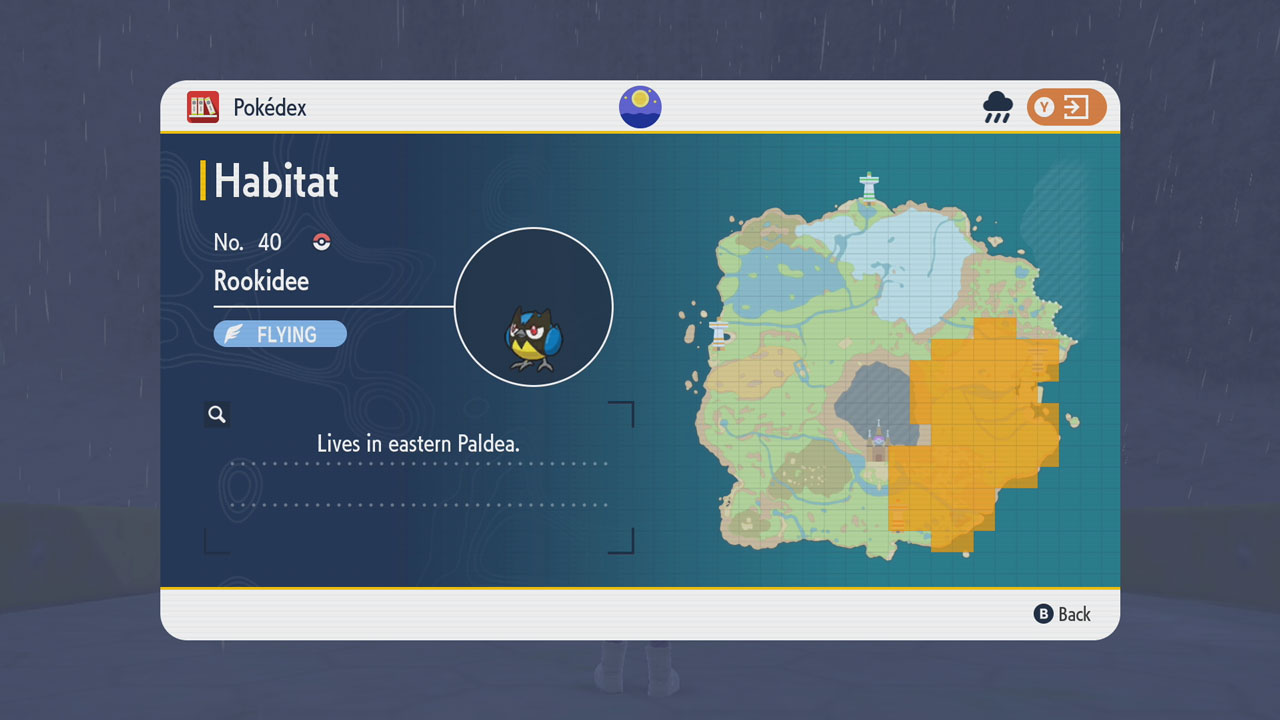
They give the same amount of EVs, so pick a location and track them down. It’s recommended that you eat a meal or sandwich with Encounter Power: Flying, so either make a sandwich for it or buy the Salisbury Steak with Fried Fixings from Barato’s in southwestern Mesagoza, which has Encounter Power: Flying Lv. 1.
The fields and hills south of Mesagoza seem to have a lot of Fletchling in particular and you should have no trouble finding them, but feel free to mix it up with Rookidee if you find a better spot.
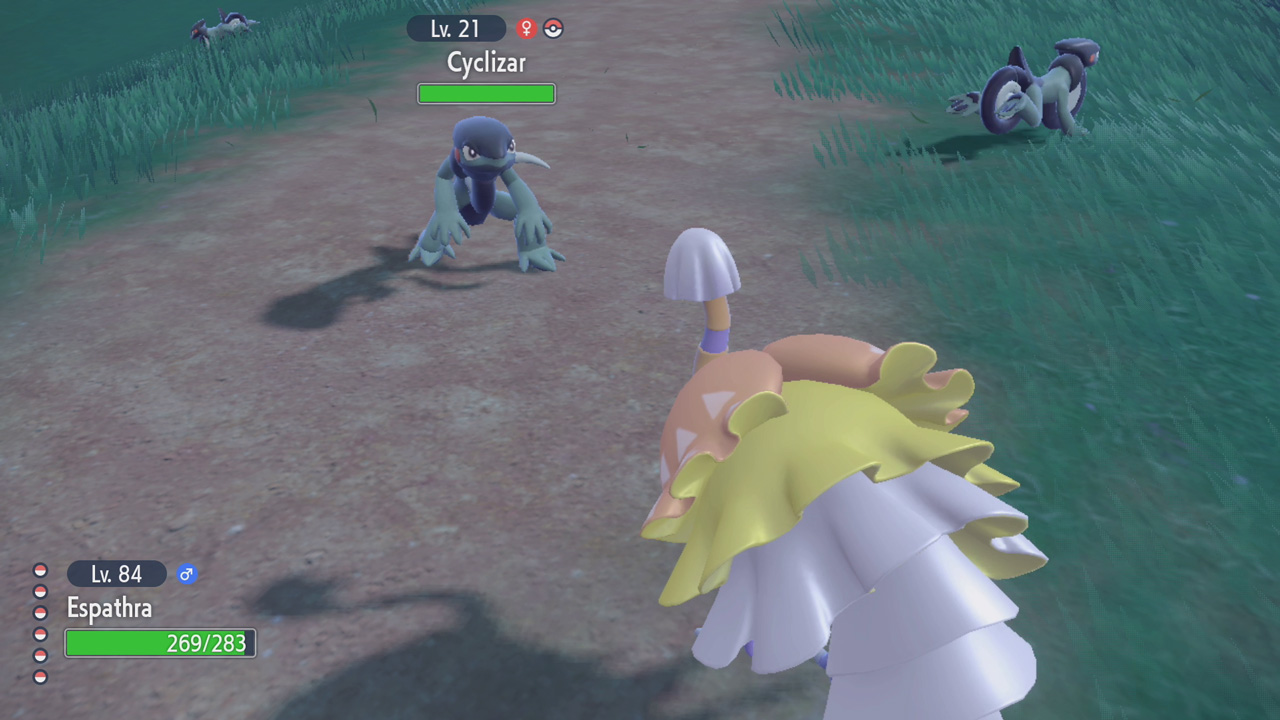
Cyclizar (mid-level, 2 base EVs)
![]()
If you’re looking for a solid, 2 base Speed EV Pokémon, then Cyclizar is a decent option. It gives 10 Speed EVs per knock out if you’re holding the Power Anklet, which means it takes a total of 26 Cyclizar to go from 0 EVs in Speed to 252 EVs as long as you have that equipped.
You can order the Escalivada at the Go-for-Broke Grill in western Mesagoza to apply Encounter Power: Dragon, or you can just make a sandwich if you’d rather. This is important to boost its encounter rate, and since it’s the only Dragon-type around the area you’ll fight it in, it makes it quite common—making a sandwich with Encounter Power: Dragon Lv. 2 is actually recommended here as it will increase their spawn chances even more, which is helpful because they go fast and can be a little tricky to chase down.
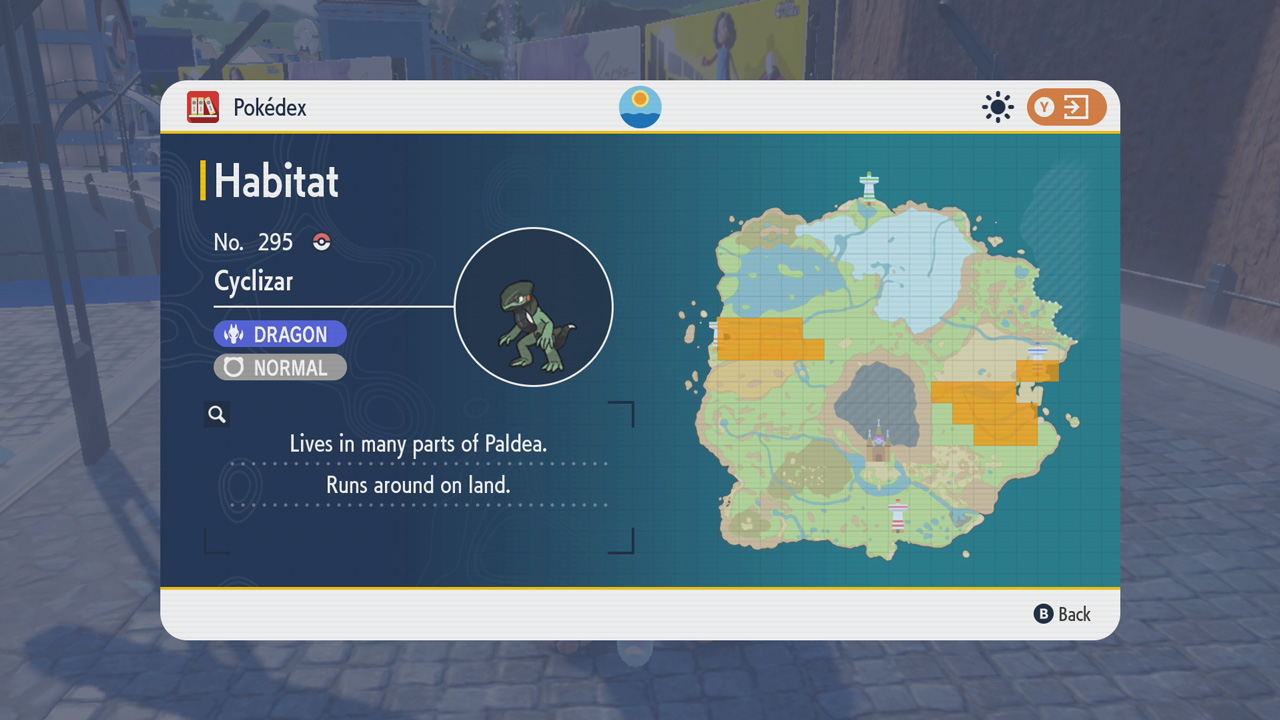
They can be found both east of Porto Marinada and also south of Levincia. Either location is fine, although the ones east of Porto Marinada may also have Ditto appear while fighting them (you can just run away from any Ditto you find and it won’t affect your EV Training).
Jumpluff (high-level, 3 base EV)
![]()
If you’ve beaten the game and are looking for something that gives more Exp. Points and more Speed EVs, Jumpluff is actually a good option. You can find it throughout the above-ground areas of Area Zero, which you’ll have full access to after beating the game and seeing the credits. It gives a base of 3 Speed EVs when knocked out or caught, meaning you’ll earn a total of 11 Speed EVs for each Jumpluff if you hold the Power Anklet. (Although you won’t find any in Area Zero, it’s important to note that Hoppip do NOT give Speed EVs; Skiploom gives a base of 2 Speed EVs, while Hoppip gives 1 Sp. Def instead.)


They appear in batches of five quite commonly in Area Zero, and you will find them quite often if you have a Encounter Power: Grass effect active, which requires eating a sandwich for. Either the Klawf Claw Sandwich (#104) or the Great Klawf Claw Sandwich (#105) are your best options for something easy. You need Klawf Sticks and, ideally, Wasabi, which can both be bought from Aquiesta Supermarket in Levincia.
It takes a total of 23 Jumpluff to go from 0 EVs to 252 Speed EVs if you’re holding the Power Anklet, earning 11 Speed EVs per battle.